

Classic car modernization means upgrading your vintage vehicle with modern components that sharpen performance, improve safety, and add daily comfort without erasing the styling that made you fall in love with it in the first place. Done right, it turns a garage queen into something you actually want to drive on a Tuesday. The approach most enthusiasts land on is the restomod, a build philosophy that keeps the original body and character intact while hiding contemporary technology underneath.
The core advantages of modernizing a classic are hard to argue with:
- Braking: Disc brake conversions dramatically cut stopping distances compared to original drum setups
- Reliability: Electronic fuel injection (EFI) replaces finicky carburetors with consistent, cold-start-ready fuel delivery
- Suspension: Coilovers and tubular control arms replace worn rubber and leaf springs with tunable, predictable handling
- Electrical: Modern wiring harnesses eliminate brittle insulation and the fire risk that comes with 50-year-old wiring
- Lighting: LED conversions improve visibility while drawing a fraction of the power of incandescent bulbs
- Drivetrain: Engine swaps like the GM LT1 6.2-liter V8 deliver modern fuel efficiency and cold-start reliability
Legal and insurance considerations follow every build decision. The classification your state assigns to a modernized vehicle determines which safety and emissions standards apply, and that classification affects resale value, registration, and what a specialty insurer will cover.
What is the resto-mod philosophy, and is it right for your build?
The term “restomod” blends restoration and modification. A full restoration returns a car to factory condition, every nut torqued to the original spec. A restomod keeps the exterior and interior looking period-correct while replacing the mechanical guts with modern equivalents. The goal, as restomod experts emphasize, is a vintage car you can drive dependably every day rather than one you trailer to shows and park.
The most successful builds prioritize what enthusiasts call “invisible upgrades.” Nobody at a car show needs to see your brake calipers to know the car is beautiful, but you will feel the difference the moment you need to stop hard in traffic. Disc brakes, EFI, and modern suspension bushings are the foundation. Cosmetic changes come after the mechanical work is solid.
Popular restomod goals break down into a few clear categories:
- Daily driver reliability: EFI, modern cooling systems, updated electrical
- Safety for modern traffic: Disc brakes, rack-and-pinion steering, LED lighting
- Handling performance: Coilovers, tubular control arms, subframe connectors
- Comfort and convenience: Air conditioning, updated seats, digital gauges
- Power upgrades: Engine swaps, upgraded fuel systems, performance exhaust
| Modernization Level | Typical Scope | Best For |
|---|---|---|
| Mild restomod | Brakes, suspension, EFI, wiring | Weekend drivers wanting reliability |
| Moderate restomod | Engine swap, full suspension, interior refresh | Enthusiasts wanting daily usability |
| Full restomod | Chassis swap, complete drivetrain, custom interior | Show builds and high-performance projects |
Pro Tip: Before committing to a full chassis swap, drive the car for a season with only the brake and suspension upgrades done. You may find that a mild restomod already delivers the driving experience you wanted, saving significant budget for other priorities.
The restomod approach also protects long-term investment value. A car that can be driven confidently in modern traffic holds appeal for a wider pool of future buyers than one that requires a trailer to attend events.
The most popular upgrades for classic car modernization
Brakes
Converting from drum brakes to vented rotors with multi-piston calipers is the single upgrade with the most immediate safety payoff. Testing on a 1970 Mustang restomod showed stopping distance dropping from 185 feet to approximately 110 feet after swapping 9-inch drums for 13-inch vented rotors and six-piston calipers. That gap is the difference between a close call and a collision in modern stop-and-go traffic.
Suspension
Original suspension geometry was designed for bias-ply tires and highway cruising, not the radial tires and cornering loads a restomod sees. Coilovers give you adjustable ride height and damping. Tubular control arms reduce unsprung weight and allow greater caster and camber adjustment, keeping tires flat against the pavement through corners. For coilover selection guidance, matching spring rate to your intended use matters as much as brand.
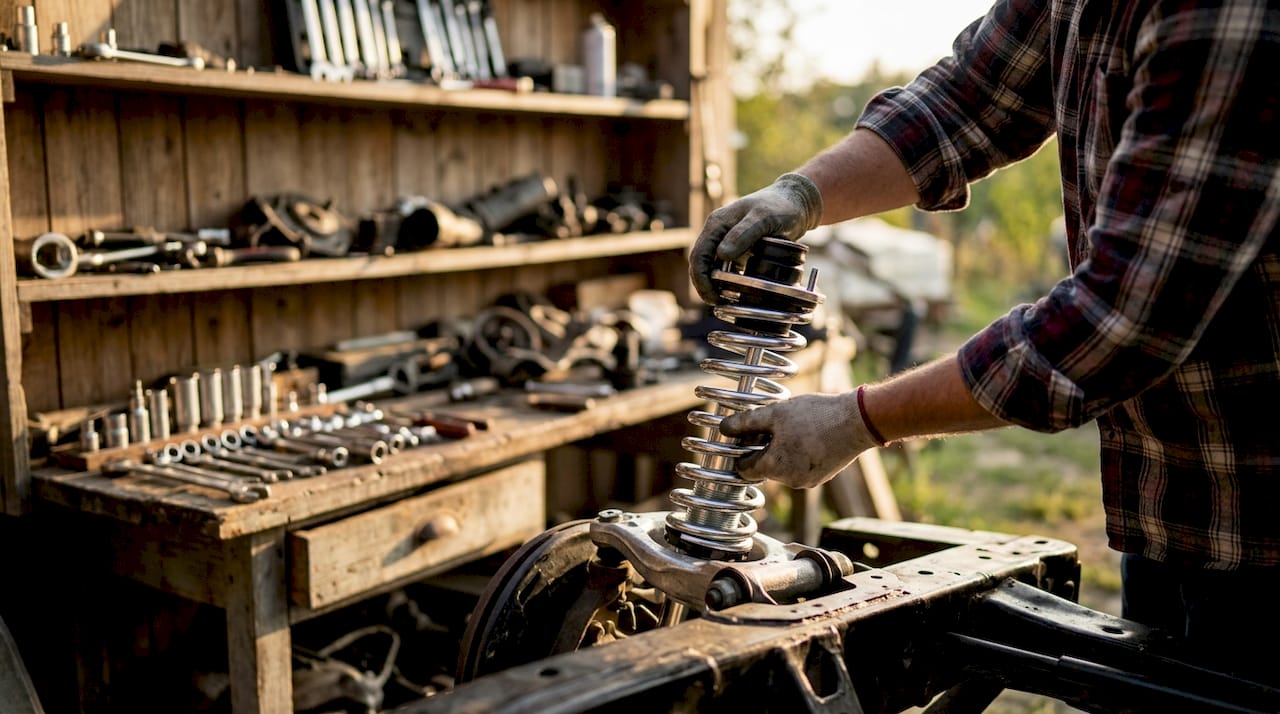
A 50-year-old unibody flexes under load, which undermines even the best suspension components. Weld-in subframe connectors tie the front and rear frame rails together, creating a rigid platform. Many builders also add an export brace and Monte Carlo bar to prevent shock tower flex during hard driving.
Drivetrain
The GM LT1 6.2-liter V8 is one of the most popular engine swap choices for American classics. It offers cold-start reliability, fuel efficiency, and consistent power that transforms a temperamental vintage car into a dependable machine. The LT1 also benefits from widespread aftermarket support, making tuning and parts sourcing straightforward. For deeper technical guidance on engine internals upgrades, the swap process involves significant fabrication, including motor mount relocation and custom headers.
Building on a stock chassis often limits what a modern drivetrain can actually deliver. Experts recommend full chassis swaps with modern-engineered subframes for builds targeting genuine contemporary performance levels.
Electrical systems
Original wiring in cars from the 1960s and 1970s is a fire hazard. Brittle insulation, corroded connectors, and undersized circuits cannot support modern accessories. Replacing the entire loom with a kit from American Autowire Automotive Hardware solves this at the root. These kits use blade-style fuses and dedicated circuits for high-draw items like electric fans and fuel pumps, which is the foundation required for safe modern electronics integration.
Lighting
LED headlights and taillights draw far less power than incandescent bulbs and deliver noticeably better visibility. Most LED conversion kits are designed to fit behind factory lenses, so the exterior appearance stays period-correct.
Pro Tip: Tackle the electrical system before adding any modern accessories. Trying to run an EFI system, electric fan, and LED lighting on original wiring is a recipe for blown fuses and chasing gremlins for months.
Key upgrades and their primary benefits:
- Disc brake conversion: shorter stopping distances, better heat dissipation
- Coilovers: adjustable ride height, improved cornering grip
- EFI conversion: reliable cold starts, reduced maintenance
- Modern wiring harness: fire safety, support for high-draw accessories
- LED lighting: better visibility, lower electrical load
- Engine swap (LT1 or similar): consistent power, fuel efficiency
How to start your classic car modernization project
The first step is an honest assessment of what you actually have. Pull the car out of the garage, put it on a lift, and document the frame condition, rust, and any previous modifications. A compromised frame changes every decision that follows, from which suspension components will fit to whether a chassis swap makes more sense than building on the original.
Set your goals before ordering a single part:
- How often will you drive it? Daily use demands different priorities than weekend shows.
- What is your total budget, including fabrication labor?
- Do you want to preserve the original VIN designation, or are you open to a custom vehicle title?
- Which upgrades are non-negotiable for safety, and which are aspirational?
Legal paperwork is not an afterthought. Detailed record-keeping, including receipts and documentation of component origins, is critical for passing state inspections and maintaining legal registration. States classify modernized vehicles differently. Florida, for example, allows custom vehicles to register by certifying compliance with the safety standards in effect during the model year the vehicle resembles, rather than current standards. California uses a Specially Constructed Vehicle (SPCNS) designation with its own inspection and documentation requirements.
- Photograph every component before removal
- Keep every receipt, including parts bought at swap meets
- Document the VIN on any donor components
- File a Statement of Construction for self-fabricated or undocumented parts
- Check your state’s specific classification rules before cutting metal
Pro Tip: Open a dedicated folder, physical or digital, on day one of the project. Every receipt, photo, and inspection report goes in it. This documentation is your insurance valuation evidence, your DMV registration package, and your resale history all in one place.
Consulting a shop experienced in both classic and modern systems early in the planning process saves money. A good fabricator will flag compatibility issues before you have already purchased parts that will not fit.
What kind of insurance does a modernized classic car need?
Standard auto insurance is the wrong tool for a restomod. A standard policy pays out based on actual cash value, which typically means the depreciated value of the donor shell, not the thousands of dollars you invested in a modern drivetrain, custom suspension, and new wiring. That gap between payout and actual build cost can be devastating after a total loss.
Specialized collector car insurance uses Agreed Value or Guaranteed Value policies. American Collectors Insurance structures coverage around the true agreed value of the vehicle, protecting the full investment rather than a depreciated estimate. Hagerty, with more than 40 years of experience insuring specialty vehicles, offers Guaranteed Value coverage specifically for resto-mod classics, hot rods, and modified vehicles. Their Vehicle Under Construction coverage automatically increases the insured value as the build progresses, which matters during a multi-year project.
Understanding how classic car insurance value is calculated helps you document your build correctly from the start.
| Coverage Type | Standard Auto Policy | Specialty Collector Policy |
|---|---|---|
| Payout basis | Actual cash value (depreciated) | Agreed or Guaranteed Value |
| Modified vehicle recognition | Rarely covered | Specifically designed for restomods |
| Build-in-progress coverage | Not available | Available (e.g., Hagerty Vehicle Under Construction) |
| Claims adjusters | General auto experience | Classic vehicle specialists |
Coverage options to discuss with a specialty insurer:
- Agreed Value or Guaranteed Value policy
- Vehicle Under Construction coverage during the build phase
- Cherished Salvage option (keep the car after a total loss payout)
- Roadside assistance tailored for collector vehicles
- Mileage flexibility for drivers who use their restomod regularly
Upgrades affect both premiums and eligibility. A high-value engine swap increases the agreed value, which raises the premium, but also ensures you are actually covered for what you built. Document every upgrade with receipts and photos before the policy is written.
How to choose quality parts and vendors for your build
Counterfeit and incorrectly spec’d parts are a real problem in the aftermarket space. A brake caliper that does not meet the dimensional tolerances of the original application, or a wiring harness with undersized conductors, creates safety risks that show up at the worst possible moment.
Criteria that separate reliable vendors from risky ones:
- Direct sourcing from verified manufacturers, not third-party distributors of unknown origin
- Clear fitment data tied to specific year, make, and model
- Warranties that cover defects, not just returns
- Technical support from staff who understand the application, not just the catalog number
- Fast, reliable shipping with straightforward return policies
Pro Tip: Call the vendor’s technical support line before placing a large order. How they answer questions about fitment compatibility tells you more about their operation than any website review.
Ozkonickustomz sources directly from vetted manufacturers, which eliminates the fitment guesswork that derails projects. For suspension work, performance springs and coilover selection require matching spring rate and travel to the specific chassis, something a knowledgeable vendor can confirm before the part ships.
Wiring harness quality is particularly unforgiving. American Autowire Automotive Hardware kits are a trusted choice in the restomod community because they are engineered for specific applications with proper conductor sizing and labeled circuits. Buying an off-brand harness to save a few hundred dollars on a build worth tens of thousands is a false economy.
A realistic project timeline for your restomod
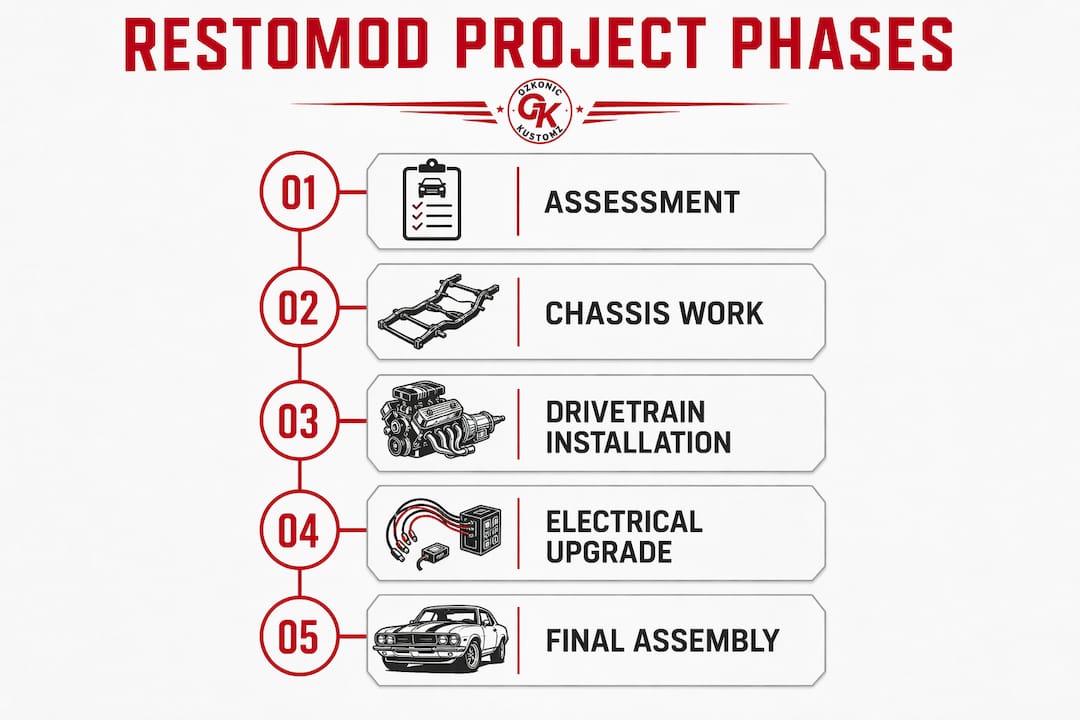
Most restomod builds typically take several months from first wrench turn to first drive, depending on scope and how much fabrication is required. Here is a practical phase breakdown:
Phase 1: Assessment and planning (weeks 1–4). Full disassembly, frame inspection, rust treatment, and documentation. Lock in your parts list and budget before anything is ordered.
Phase 2: Chassis and structural work (weeks 5–12). Subframe connectors, any chassis swap work, frame reinforcement, and body-off prep if needed. This is the foundation everything else builds on.
Phase 3: Drivetrain and suspension (weeks 13–24). Engine and transmission installation, motor mounts, driveshaft, and full suspension rebuild. Brake system conversion happens here too.
Phase 4: Electrical and fuel systems (weeks 25–32). Full wiring harness replacement, EFI installation, fuel pump, and any modern accessories. Budget more time than you think for this phase.
Phase 5: Interior, body, and finishing (weeks 33–48). Paint, bodywork, interior installation, lighting, and final assembly. State inspection and registration paperwork runs parallel to finishing work.
Build a 20% time buffer into every phase. Parts delays, fabrication surprises, and inspection scheduling add weeks to even well-planned projects.
What does a classic car modernization project actually cost?
Costs vary widely by scope, reflecting the diversity of project budgets among US builders.
Labor is often the largest variable. A shop charging $100–$150 per hour for fabrication work can add $20,000 or more to a full build. Enthusiasts who handle their own labor on straightforward upgrades like brakes, suspension, and wiring can cut costs significantly, provided they have the skills and tools.
Parts sourcing strategy also affects cost. Buying from vendors who source directly from manufacturers reduces the risk of returns and replacements that inflate the total. Budget separately for registration fees, which vary by state, and for the specialty insurance policy, which is a recurring annual cost tied to your agreed value.
Common challenges and how to work through them
Compatibility between old and new. The most common frustration in restomod builds is discovering that a modern component does not fit the original chassis without fabrication. Suspension geometry changes when you swap from leaf springs to coilovers, and brake line routing often needs custom work after a disc conversion. Research fitment thoroughly before purchasing, and buy from vendors who can confirm compatibility for your specific application.
Electrical gremlins. Old wiring that was not fully replaced tends to cause intermittent problems that are maddening to diagnose. The fix is almost always the same: replace the entire harness rather than patching sections. Partial rewires leave old connectors and grounds in the circuit, which continue to cause issues.
Emissions compliance. In states with active smog programs, the engine year or the vehicle’s classification year determines which tailpipe standards apply. California’s regulations are the most complex, and CARB-compliant parts requirements affect which EFI systems and catalytic converters are legal for street use. Research your state’s rules before selecting an engine swap candidate.
Registration and title complications. Swapping in a custom chassis often triggers a reclassification from the original model year to a Specially Constructed Vehicle, which can affect which safety standards apply and what the car is worth on the open market. Retaining the original frame and body structure generally preserves the historic title designation. When in doubt, consult your state DMV before cutting metal.
Budget overruns. Almost every restomod costs more than the initial estimate. The most common culprits are hidden rust discovered during disassembly, fabrication required to make modern parts fit, and the temptation to upgrade one more thing while the car is already apart. Build a contingency of at least 15–20% into your budget from day one.
Pro Tip for troubleshooting: When a newly installed system behaves erratically, resist the urge to start swapping parts. Trace the ground circuit first. A poor chassis ground causes more mysterious electrical and sensor problems in restomod builds than any other single issue.
Ozkonickustomz has the parts your build actually needs
Finding compatible, quality parts for a restomod is where most projects stall. Generic retailers stock what sells in volume, not what fits a 1969 Camaro or a 1972 C10. Ozkonickustomz sources directly from vetted manufacturers, which means every part comes with confirmed fitment data and the quality standards a serious build demands.
The American Autowire Highway 22 Modular Wiring Kit available through Ozkonickustomz is a direct answer to one of the most common restomod headaches: getting a modern electrical system into a classic chassis without spending weeks chasing wiring diagrams. It is engineered for truck-mount applications with labeled circuits, blade fuses, and dedicated high-draw circuits built in. Fast shipping and a straightforward return policy mean you are not waiting weeks to find out a part does not fit. Browse the catalog or reach out to the Ozkonickustomz team directly for fitment confirmation before you order.
Key Takeaways
Classic car modernization succeeds when safety and structural upgrades come first, documentation runs parallel to the build, and parts are sourced from vendors who can confirm fitment before anything ships.
| Point | Details |
|---|---|
| Brakes first, always | Disc brake conversions reduce stopping distances from 185 feet to around 110 feet compared to original drum setups. |
| Document everything | Receipts, photos, and a Statement of Construction are required for DMV registration and insurance underwriting. |
| Specialty insurance is non-optional | Agreed Value policies from carriers like Hagerty and American Collectors Insurance protect the full build cost, not a depreciated shell value. |
| Chassis integrity drives all other upgrades | Subframe connectors and structural reinforcement must precede suspension and drivetrain work for the upgrades to perform as intended. |
| Ozkonickustomz for verified parts | Ozkonickustomz sources directly from manufacturers, providing confirmed fitment and expert support for restomod builds. |
