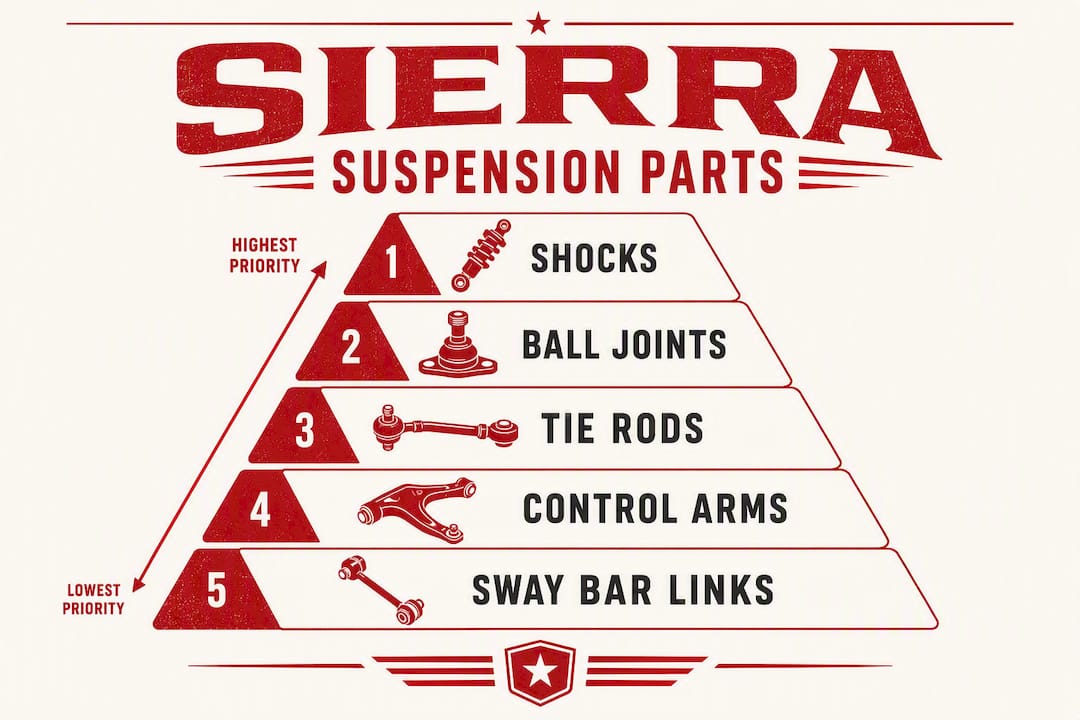
For most GMC Sierra 1500 owners, the short answer is this: prioritize shocks/struts, ball joints, and tie rods first, then address springs, sway bar links, and lift or leveling components based on your use case. Default to GM OEM parts if your truck is under warranty or you want factory ride quality preserved. Choose vetted aftermarket when you tow regularly, run off-road, or want longer service intervals than factory-sealed components typically deliver.
Before you order anything, run three quick checks:
- VIN match: Use your full 17-digit VIN to confirm the part fits your exact build, not just the model year.
- OE part number cross-reference: Pull the GM OE number from your service manual or dealer parts lookup and verify the aftermarket listing matches it.
- Return and fitment guarantee: Confirm the seller offers a clear fitment guarantee and a no-hassle return window before you click buy.
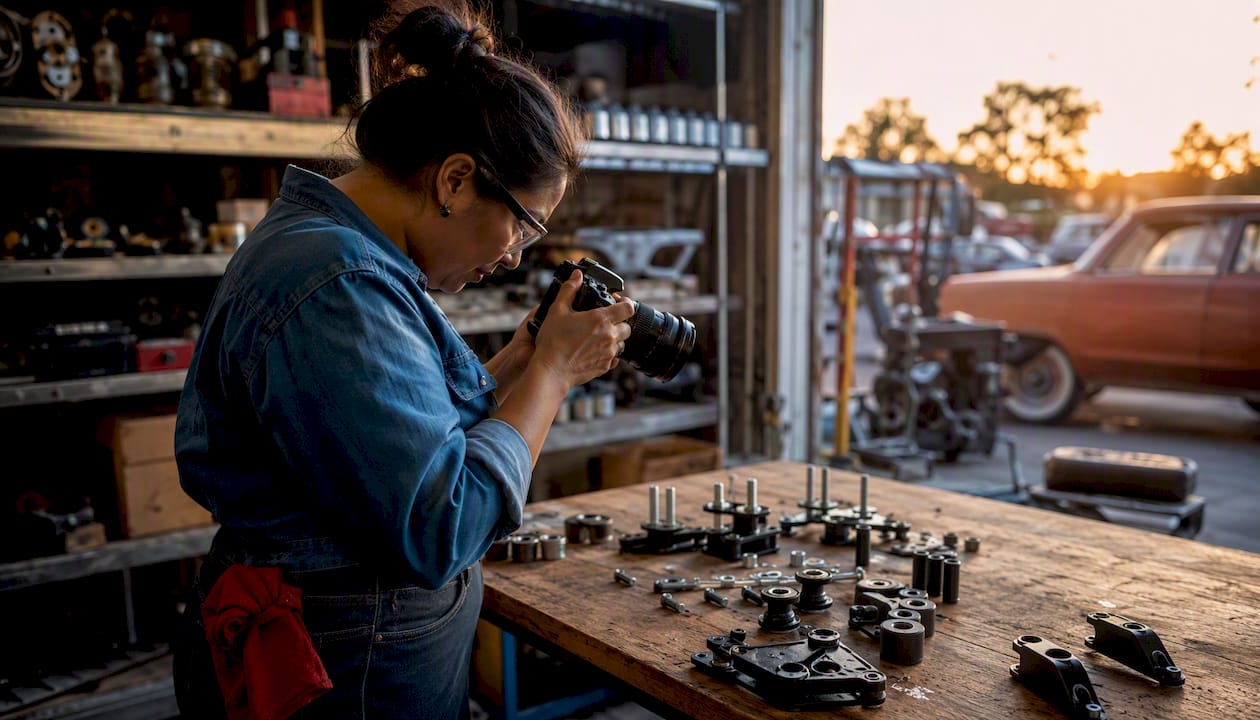
Pro Tip: Note your current ride height and photograph the existing mounting points before ordering. If your truck has any lift, leveling spacers, or non-stock modifications, those details change which parts you need.
Table of Contents
- What do the main Sierra suspension parts do, and when do they fail?
- How do model year, cab, drivetrain, and trim affect which parts fit your Sierra?
- OEM or aftermarket: which suspension parts should you choose for your Sierra?
- What do Sierra suspension parts cost, and how hard are they to install?
- How to inspect your Sierra’s suspension and know when to replace parts
- What to verify before you place your Sierra suspension parts order
- Why Ozkonickustomz is a reliable source for Sierra suspension parts
- What should you order first, and what are the next steps?
- Key Takeaways
- The part that trips up most Sierra owners
- Get the right Sierra suspension parts from Ozkonickustomz
- Useful sources and further reading
What do the main Sierra suspension parts do, and when do they fail?
Every suspension category on the Sierra 1500 has a distinct job, and each one fails in a recognizable way. Knowing the symptoms saves you from replacing the wrong part.
Shocks and struts control body motion. When they wear out, the truck bounces excessively after bumps, sways on highway curves, or rocks front-to-back during braking. Leaking fluid on the shock body is a definitive replacement trigger. Firestone’s service guidance notes there is no fixed mileage schedule for shocks; replacement is symptom-driven.
Coil and leaf springs carry the truck’s static weight. Sagging springs show up as uneven ride height side-to-side or front-to-back, and they accelerate wear on every other component above and below them.
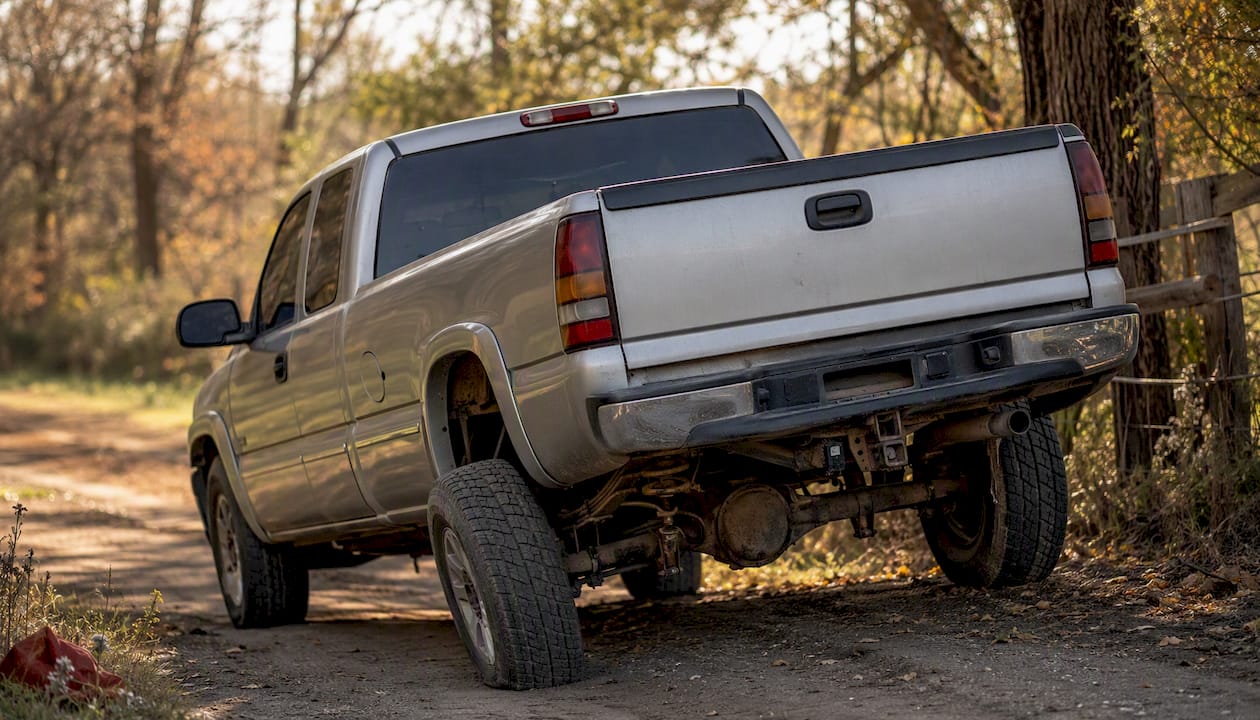
Control arms and bushings locate the wheel in space. Cracked or collapsed bushings produce a clunking noise over rough pavement and cause vague, wandering steering. Bent control arms after a hard impact are a safety issue, not a monitor-and-wait situation.
Ball joints connect the control arm to the steering knuckle. Worn ball joints create a knocking sound and, in severe cases, allow the wheel to shift under load. The GMC Sierra service manual diagnostic chart maps worn ball joints directly to replacement, not adjustment.
Tie rods and drag links translate steering input to the wheels. Looseness here shows up as steering play, pulling to one side, or uneven tire wear on the inner or outer edge.
Sway bar links and bushings reduce body roll. Failed links often produce a rattling or clunking sound at low speeds over bumps, especially on rough pavement or gravel.
Lift and leveling kits raise ride height for clearance or aesthetics. They change the geometry of every component above, which is why alignment and sometimes new upper control arms are required after installation.
Air springs and airbag kits assist load leveling under heavy payloads or towing. They do not replace worn shocks; they work alongside them.
Traction and anti-roll bars improve stability under load and off-road articulation. Worn bushings here are often overlooked until handling degrades noticeably.
Dealer maintenance guidance recommends inspecting alignment and suspension at least annually, with shorter intervals for trucks used for towing, plow duty, or regular off-road use. Road salt exposure, common in northern states, accelerates bushing and fastener corrosion significantly.
| Part | Common Failure Symptoms | Inspection Interval | Buyer Priority |
|---|---|---|---|
| Shocks/struts | Excessive bounce, leaking fluid, sway | Annual or symptom-driven | High |
| Coil/leaf springs | Sagging ride height, uneven stance | Annual | Medium |
| Control arms/bushings | Clunking, wandering steering | Annual | High |
| Ball joints | Knocking, wheel play under load | Annual | High (safety) |
| Tie rods | Steering looseness, inner/outer tire wear | Annual | High (safety) |
| Sway bar links/bushings | Rattle at low speed over bumps | Annual | Medium |
| Lift/leveling kit parts | Geometry shift, alignment drift | After install and annually | Situational |
| Air springs/airbag kits | Sag under load, uneven rear height | Annual | Load-use trucks |
How do model year, cab, drivetrain, and trim affect which parts fit your Sierra?
Fitment on the Sierra 1500 is more specific than most buyers expect. A part listed for “GMC Sierra 1500” can be wrong for your truck if the year, cab configuration, drivetrain, or trim level differs from the application table.
Follow these steps before placing any order:
- Decode your VIN. The 17-digit VIN encodes the model year, plant, engine, and axle configuration. Use the NHTSA VIN decoder at vin.nhtsa.dot.gov or your dealer’s parts lookup to pull the exact build data.
- Confirm cab and bed configuration. Regular Cab, Double Cab, and Crew Cab trucks often use different shock lengths and spring rates. Short-bed and long-bed configurations can also affect rear suspension geometry.
- Identify your drivetrain. 2WD and 4WD Sierras use different front control arms, ball joints, and hub assemblies. Never assume a 2WD part crosses over to a 4WD application.
- Check your trim and option codes. Higher trims on newer Sierra 1500s may include magnetic ride control or factory air suspension. These systems require generation-specific replacement parts that are not interchangeable with standard coil-over or passive shock setups.
- Cross-reference the OE part number. Pull the GM OE number from a dealer parts catalog or your service manual, then verify the aftermarket listing explicitly references that number.
- Check for towing package differences. Trucks ordered with the factory towing package often use heavier rear springs and different shock valving than base-spec trucks of the same year and cab.
Fitment warning: Never assume a part listed for “Chevrolet Silverado 1500” fits your Sierra 1500 without confirming the OE number matches. The platforms share many components, but trim-level and option-code differences mean some SKUs are Sierra-specific. The same caution applies to generic “1500” listings that do not specify the generation or body style.
Pro Tip: Photograph your current mounting hardware, note any spacers or adapters already installed, and save the photos to your phone’s camera roll labeled with the date and mileage. If a fitment dispute comes up later, those photos resolve it in minutes.
OEM or aftermarket: which suspension parts should you choose for your Sierra?
The honest answer is that neither is universally better. The right choice depends on your truck’s warranty status, how you use it, and how long you plan to keep it.
OEM (GM genuine parts) advantages:
- Guaranteed fitment with no cross-reference guesswork
- Preserves factory NVH (noise, vibration, harshness) tuning
- Maintains dealer warranty coverage without documentation risk
- Predictable performance matched to the original suspension calibration
OEM disadvantages:
- Factory-sealed ball joints and bushings cannot be greased, which limits service life
- Higher unit cost than many aftermarket alternatives
- Availability gaps on older model years
Vetted aftermarket advantages:
- Premium aftermarket parts can add grease fittings, improved metallurgy, and better corrosion coatings that extend service life beyond factory-sealed components
- Better suited to heavy-duty, towing, or off-road duty cycles where factory specs are a floor, not a ceiling
- Total cost of ownership can favor premium aftermarket when a longer-lasting unit reduces labor touchpoints over the truck’s life
Vetted aftermarket disadvantages:
- Quality varies widely; unvetted sources carry counterfeit and dimensional-tolerance risk
- Some installs require documentation to protect Magnuson-Moss warranty rights
- Material and fatigue specs are not always published, making comparison harder
Decision checklist — use this before ordering:
- Is the truck under the factory powertrain or bumper-to-bumper warranty? If yes, OEM is the lower-risk default.
- Do you tow at or near the truck’s rated capacity regularly? Vetted aftermarket heavy-duty shocks and springs are worth the upgrade.
- Do you run the truck off-road or on unpaved roads frequently? Aftermarket components with greaseable joints and upgraded coatings pay for themselves.
- How old is the truck, and what is your ownership horizon? On a high-mileage truck you plan to keep, serviceability matters more than OE spec matching.
- Can you document the install? Keep receipts, part numbers, and installer invoices to protect your warranty position under the Magnuson-Moss Warranty Act.
For a daily driver under warranty, OEM is the right call. For a truck that tows a fifth-wheel every weekend or sees regular trail use, vetted aftermarket with greaseable joints and upgraded valving is the smarter long-term investment. You can read more about OEM vs aftermarket trade-offs in Ozkonickustomz’s breakdown of the topic.
What do Sierra suspension parts cost, and how hard are they to install?
Price ranges below reflect typical US retail for quality parts. Labor estimates assume a competent independent shop; dealer rates run higher.
| Part | Typical Retail Range | Est. Shop Hours | DIY Feasibility |
|---|---|---|---|
| Shocks (pair, entry-level) | — | 1–2 hrs | Moderate DIY |
| Shocks (pair, premium/HD) | — | 1–2 hrs | Moderate DIY |
| Control arm (per side) | — | 2–3 hrs | Advanced DIY |
| Ball joint (per side) | — | — | Advanced DIY |
| Tie rod end (per side) | — | — | Moderate DIY |
| Sway bar link (pair) | — | — | Easy DIY |
| Leveling kit | — | — | Moderate DIY |
| Lift kit (2–4 in.) | — | — | Shop recommended |
| Rear airbag kit | — | 2–4 hrs | Moderate DIY |
Hidden costs to budget for:
- Wheel alignment: Always required after replacing shocks, control arms, tie rods, or any lift/leveling component. Skipping alignment accelerates tire wear and undoes the handling benefits of new parts. Budget $100–$150 for a four-wheel alignment.
- New hardware: Rusted or torque-to-yield fasteners often need replacement during teardown, especially on older trucks or those from salt-belt states.
- Additional parts found during teardown: A shop opening the front suspension for a control arm job will often find worn ball joints or tie rod ends at the same time. Budget for the possibility.
Sway bar links and shock absorbers are reasonable DIY jobs with basic hand tools and a floor jack. Control arm and ball joint work requires a press or pickle fork, a torque wrench, and confidence reading a service manual. Lift kit installs on a 4WD Sierra, especially those requiring upper control arm replacement, are best left to a shop that can also perform the post-install alignment.
How to inspect your Sierra’s suspension and know when to replace parts
You do not need a lift to catch most suspension problems early. A driveway inspection catches the obvious failures; a jack-stand check finds the rest.
Step-by-step inspection sequence:
- Walk-around visual check. Look for fluid streaks on shock bodies, cracked or torn rubber bushings visible at control arm pivot points, and uneven ride height side-to-side or front-to-back.
- Bounce test. Push down hard on each corner of the truck and release. The truck should rebound once and settle. Two or more bounces indicate a worn shock on that corner.
- Jack-and-wiggle check for ball joints. Lift the front axle until the tire clears the ground. Grab the tire at 12 and 6 o’clock and try to rock it. Any detectable vertical play points to a worn lower ball joint.
- Tie rod check. With the front wheels on the ground, have a helper turn the steering wheel slightly while you watch the tie rod ends. Movement in the joint before the wheel moves indicates wear.
- Spring sag measurement. Measure ride height from the center of the wheel to the fender lip on both sides. A difference of more than 3/4 inch side-to-side, or a front-to-rear drop compared to factory spec, suggests spring fatigue.
- Sway bar link check. Grab each sway bar link and try to move it. A clunking or loose link needs replacement.
When to stop DIY and call a shop:
- Any vertical play in a ball joint under load
- A bent or cracked control arm (visible after an impact or severe pothole)
- Structural rust on spring perches or shock mounts
- Steering that pulls hard to one side after a visual inspection turns up nothing obvious
Annual inspections are the baseline, but trucks used for towing, plow duty, or regular off-road driving should be checked every six months. Salt-belt trucks need fastener and bushing checks every fall before winter driving begins.
Inspection frequency rule: Inspect suspension annually at minimum. Shorten that interval to every six months if you tow regularly, run unpaved roads, or operate in a high-salt environment.
What to verify before you place your Sierra suspension parts order
A wrong part ordered is a week lost. Run this checklist on every product page before checkout.
On the product page:
- Full vehicle application table listing year, cab, bed, drivetrain, and trim
- OE part number cross-reference explicitly stated
- Photos of the actual part and mounting hardware
- Hardware list confirming what is included (some kits require separate hardware purchases)
- VIN-checked fitment option or fitment confirmation tool
On the seller’s policy page:
- Fitment guarantee: does the seller cover return shipping if the part does not fit as listed?
- Return window: 30 days is standard; shorter windows are a risk flag
- Restocking fees: some sellers charge 15–20% on returns; factor this into your decision
- Shipping damage policy: confirm the seller replaces damaged-in-transit parts without a fight
- Warranty duration and what it covers (defects vs. wear)
Handling a return or exchange: If a part arrives and does not fit, document the mismatch immediately. Photograph the part next to your existing component, note the measurement difference, and contact the seller with your order number, VIN, and the fitment confirmation you received at checkout. A seller with a genuine fitment guarantee resolves this quickly.
Pro Tip: Screenshot the fitment confirmation page and save any chat or email exchange where the seller confirmed your VIN match. Store them in a folder with your order number. If a dispute arises, that paper trail is your fastest path to a resolution.
Why Ozkonickustomz is a reliable source for Sierra suspension parts
Ozkonickustomz sources directly from vetted manufacturers, which cuts out the middleman layers where counterfeit and off-spec parts enter the supply chain. Every product listing includes detailed fitment tables, OE part number cross-references, and hardware lists so you know exactly what you are getting before you order.
Key buyer benefits when ordering from Ozkonickustomz:
- VIN-checked fitment: Submit your VIN before or during checkout to confirm the part matches your exact build.
- Direct manufacturer sourcing: Parts come from vetted suppliers, not gray-market distributors, which matters for ball joints, control arms, and other safety-critical components.
- Clear return and warranty policy: Fitment issues are handled without the restocking-fee runaround common at large generic marketplaces.
- Expert fitment support: Contact the team directly with your VIN and build details before ordering if you have any doubt about application.
- Airbag and load-leveling kits in stock: Ozkonickustomz carries rear airbag kits for GM trucks and load-leveling kits compatible with newer Sierra 1500s, with fitment tables that specify year, cab, and bed configuration.
Fitment guarantee: Ozkonickustomz’s fitment guarantee means that if a part is listed as compatible with your VIN-confirmed build and it does not fit as described, the return process is covered. Keep your VIN confirmation and order documentation to make any claim straightforward.
For lift kit sourcing options and alternatives, Ozkonickustomz has also published a lift kit marketplace comparison that covers what to look for in a vetted supplier.
What should you order first, and what are the next steps?
Address safety-critical steering and suspension components before anything else: shocks showing leakage or excessive bounce, ball joints with detectable play, and tie rods with looseness at the joint. Springs, sway bar links, and lift or leveling components come next based on your use case and budget.
Next steps before and after ordering:
- Verify your VIN and pull your OE part numbers from a dealer catalog or service manual
- Cross-check the aftermarket listing against those OE numbers on the product page
- Budget for a four-wheel alignment after any steering or suspension work
- Schedule the alignment appointment before the install so there is no delay between the job and the alignment
For fitment help or to browse suspension components for your Sierra, contact Ozkonickustomz directly with your VIN and build details.
Key Takeaways
Prioritize safety-critical suspension components first: shocks, ball joints, and tie rods are the parts most likely to affect handling and safety when worn.
| Point | Details |
|---|---|
| Inspect annually | Inspect suspension at minimum once a year; shorten to every six months for towing, off-road, or salt-belt use. |
| VIN-check every order | Always confirm fitment using your full 17-digit VIN before purchasing any Sierra suspension part. |
| Safety items first | Replace worn shocks, ball joints, and tie rods before addressing springs, sway bar links, or lift components. |
| OEM vs aftermarket decision | Use the duty-cycle checklist: OEM for warranty-sensitive builds, vetted aftermarket for towing, off-road, or extended-life use. |
| Ozkonickustomz fitment support | Ozkonickustomz offers VIN-checked fitment, direct manufacturer sourcing, and clear returns for Sierra suspension orders. |
The part that trips up most Sierra owners
The single most common mistake in a Sierra suspension job is not the part choice. It is the sequence. Owners replace shocks, feel an improvement, and stop there, not realizing the ball joints or tie rods they drove past on the way to the shock were already at the edge of their service life. Six months later, they are back under the truck.
The smarter approach is to treat any suspension job as a full inspection opportunity. When the front end is already apart for a control arm or shock replacement, the labor cost to check and replace ball joints and tie rod ends at the same time is marginal. The cost of doing it as a separate job six months later is not.
On the OEM versus aftermarket question, the conventional wisdom that “OEM is always safer” undersells what vetted aftermarket parts actually offer on a working truck. A greaseable ball joint on a truck that tows a trailer every weekend will outlast a factory-sealed unit by a meaningful margin, and the ability to service it extends that advantage further. The key word is vetted. The risk is not aftermarket as a category; it is aftermarket from an unvetted source with no published specs and no fitment guarantee.
Document the truck before any work starts. Ride height measurements, photos of the mounting points, and a note of any existing modifications take ten minutes and save hours of back-and-forth if a fitment question comes up later.
Get the right Sierra suspension parts from Ozkonickustomz
If you have spent time cross-referencing OE numbers and reading fitment tables, you already know how quickly a wrong part wastes a weekend. Ozkonickustomz gives Sierra 1500 owners a faster path to the right SKU: direct sourcing from vetted manufacturers, detailed product pages with full fitment tables, and a team you can contact with your VIN before you order.
Ozkonickustomz carries rear airbag and load-leveling kits built for GM trucks, with application tables that specify year, cab, and bed configuration down to the trim level. The return policy is straightforward, shipping is fast, and the fitment guarantee means a mislisted part does not become your problem to solve alone. Browse the suspension catalog at ozkonickustomz.com or reach out with your VIN for a fitment confirmation before you place your order.
Useful sources and further reading
These references were used throughout this article for maintenance schedules, diagnostic guidance, fitment rules, and OEM versus aftermarket analysis.
- Recommended service and maintenance schedule for GMC Sierra 1500 — Don Johnson Auto Group: Covers annual inspection cadence and severe-service intervals for towing, plow, and off-road use.
- 2017 GMC Sierra 1500 Suspension Service — Firestone Complete Auto Care: Symptom-based replacement guidance for shocks and struts; alignment requirements after suspension work.
- Suspension Trouble Shooting — 2018 GMC Sierra 1500 Base service manual (Lemon Manuals): OEM diagnostic chart mapping suspension symptoms to corrections; use for torque specs and component-level diagnosis.
- Suspension Parts: OEM Fit vs Aftermarket Comparison — HG Iron: Decision framework covering fitment, metallurgy, testing, warranty, and lifecycle cost.
- The Great Debate: Is OEM Better Than Aftermarket Replacement Suspension Parts? — Mevotech: Covers grease fittings, material upgrades, and corrosion coatings in premium aftermarket components.
- OEM vs Aftermarket Truck Parts — Millennials Maintenance: Total cost of ownership analysis comparing service lifespan and labor costs between low-cost and premium parts.
- Common signs of a failing suspension system by model in a GMC Sierra — Fabrik&Moi Blog: Generation-specific fitment notes including magnetic ride control and air suspension options on newer Sierra trims.
For torque specifications and detailed suspension diagnostics, always consult the official GM service manual for your specific model year, engine, and drivetrain configuration.