For most truck and overland builds, a bumper-mounted combo LED light bar paired with corner pod lights is the right starting point. That combination covers forward distance, peripheral visibility, and modular expansion without overcomplicating the wiring or the budget.
Here’s how that breaks down by use-case:
- High-speed desert: a large combo light bar on the bumper or roof, plus a pair of spot driving lights for max distance. Prioritize candela output and a tight center beam.
- Technical rock crawling: Skip the big bar. Two flood pods on the A-pillars and a pair of ditch lights give you the near-field, wide-angle coverage that slow trails actually need.
- Overlanding/night camp: Combo bar on the bumper for driving, amber pods for camp perimeter and dusty conditions, and a rear work light for campsite setup.
- Daily driver with occasional trails: A compact bumper-mounted combo bar keeps the rig street-friendly and covers most trail situations without roof-mount compliance headaches.
- UTV/ATV: Compact bar or dual pod setup on the cage or front bumper. Small footprint, easy wiring, and enough output for trail speeds.
Ozkonickustomz stocks compatible wiring harnesses, relay kits, and fitment parts to support all of these configurations. Look for lights carrying DOT/SAE approval markings for any setup you plan to run on public roads.
Pro Tip: Effective lumens at the target distance matter more than peak lumen ratings. A 5,000-lumen light with precision optics will outperform a 10,000-lumen bar with scattered output on a real trail.
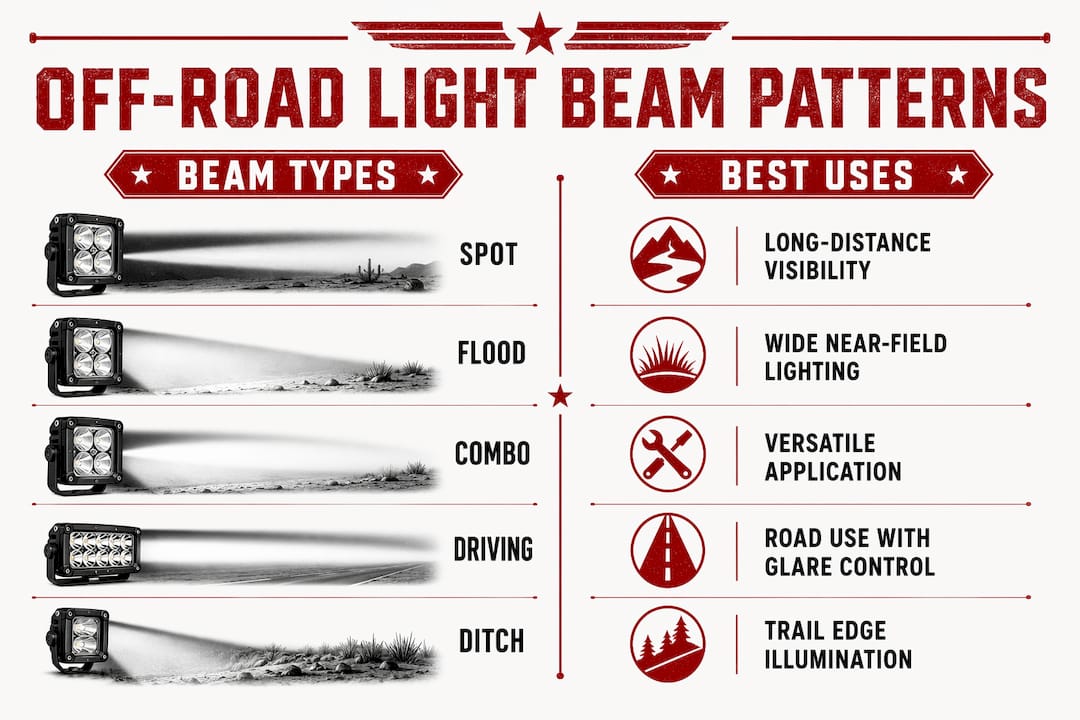
Table of Contents
- What type of off road lighting do you actually need?
- Why beam pattern matters more than raw lumens
- How to choose the right off-road lights before you buy
- How to wire off-road lights without killing your alternator
- Are your off-road lights street legal?
- Keeping your lights running: maintenance and troubleshooting
- Why optics and modular systems beat raw lumen numbers
- Key Takeaways
- The case for building your lighting system the right way
- Get the right wiring kit and fitment parts from Ozkonickustomz
- Useful sources and further reading
What type of off road lighting do you actually need?
The physical form factor of a light determines where it mounts, what it illuminates, and how it integrates with your rig. Getting this wrong means buying twice.
LED light bars
Light bars are long, multi-LED housings that deliver the widest and longest beam spread of any auxiliary light type. They excel at high-speed open terrain where you need maximum forward coverage in a single unit. Most use a combo beam, with spot optics in the center for distance and flood optics on the ends for side coverage. The trade-off: roof-mounted bars create hood glare and trigger mounting-height regulations in most U.S. states. Bumper mounting solves both problems for most builds.
LED pods and cube lights
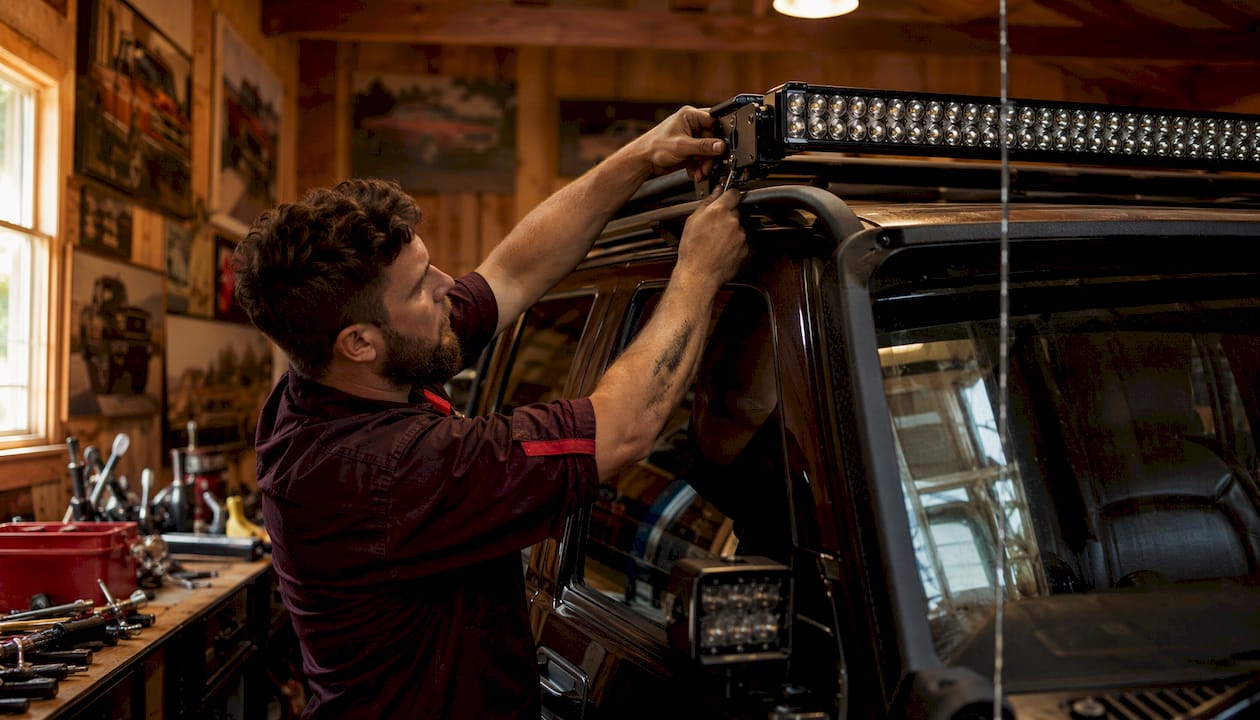
Pods are compact, modular, and incredibly versatile. A single pod won’t flood a trail, but a strategically placed set can solve lighting problems a bar never could. Spot pods on the bumper for distance, flood pods on the A-pillars for cornering, and side-firing pods for ditch visibility. That layered approach is how serious off-road builds actually work.
Round driving lights
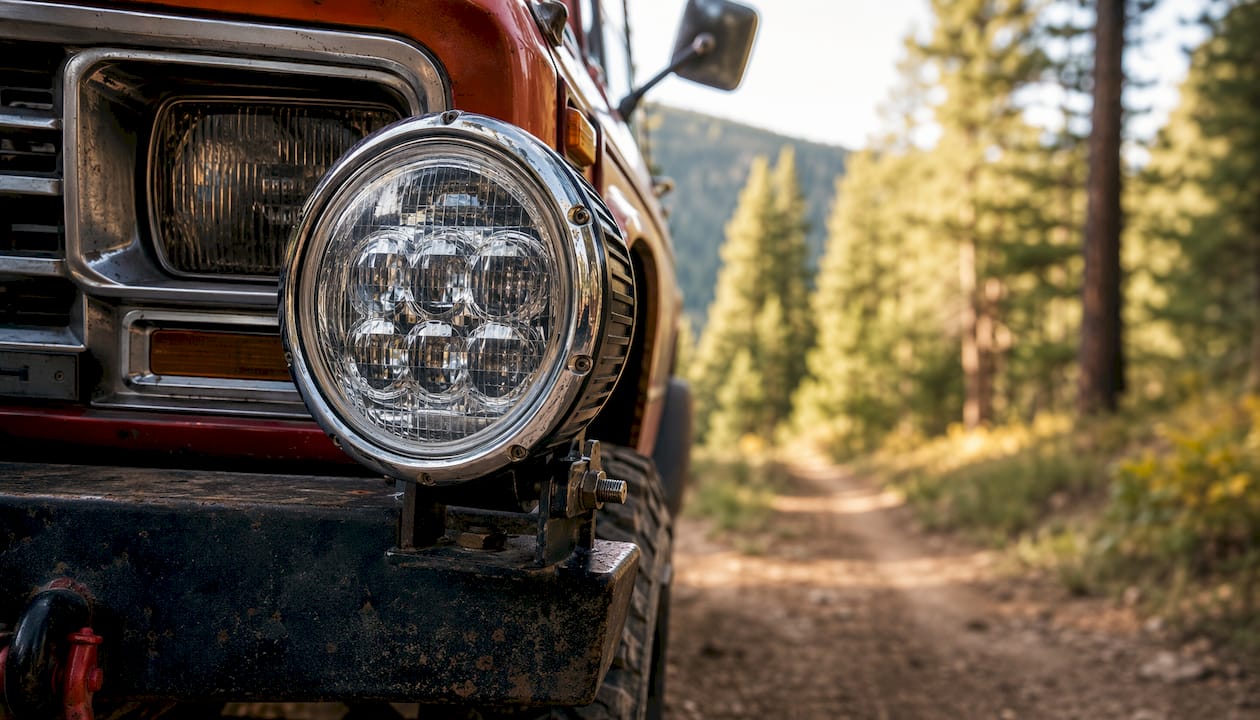
Round driving lights are the long-range specialists. Optically engineered for a tight, focused beam, they project farther than any bar of equivalent wattage. Classic front-end mounting on trucks and Jeeps, and they pair naturally with a combo bar to fill the distance gap. The Snake Eye 7-inch lens assembly at Ozkonickustomz is a good example of this style for classic vehicle fitment.
Amber and fog lights
Amber light has a longer wavelength than white, which means it scatters less in dust, fog, rain, and snow. Warm white at 3,000K and amber tones improve visibility in particulate-heavy conditions compared with cool white above 6,000K, which looks bright but bounces back off airborne debris. Amber lights work as fog lights, ditch lights, or trail lights depending on mounting position.
Ditch and side-firing lights
Ditch lights mount on the A-pillars or upper bumper corners and fire outward at roughly 45 degrees. They eliminate the blind spots a forward-facing bar leaves at the trail edges. On tight switchbacks or rocky ledges, they’re the difference between guessing and seeing.
Strengths and weaknesses at a glance:
- Light bars: Wide + long coverage, best for high-speed open terrain; bulky, roof-mount compliance issues
- Pods/cubes: Modular, targeted, versatile mounting; lower single-unit output
- Round driving lights: Maximum long-range distance; narrow field of view, not useful on slow trails
- Amber/fog lights: Cuts through dust and moisture; not a substitute for primary white lighting
- Ditch lights: Eliminates corner blind spots; requires additional wiring runs
| Light Type | Best Use-Case | Typical Mounting | Approximate Cost |
|---|---|---|---|
| LED light bar | High-speed, open terrain | Bumper, roof, grille | $80 and up |
| LED pods/cubes | Technical trails, ditch, corner | A-pillar, bumper corners, cage | moderate price per pair |
| Round driving lights | Long-distance visibility | Front bumper, grille | moderate price per pair |
| Amber/fog lights | Dust, fog, rain, snow | Bumper, lower grille | moderate price per pair |
| Ditch/side-firing lights | Corner visibility, switchbacks | A-pillar, upper bumper | moderate price per pair |
Pro Tip: Build a modular system. Start with a primary combo bar, then add ditch pods and amber lights as your trails demand them. Buying in stages reduces upfront cost and lets you tune the rig to actual terrain rather than guessing at a full kit.
Vehicle fitment notes: Trucks and full-size SUVs handle 40–50 inch bars well on bumpers or roofs. Jeep Wranglers and smaller SUVs fit cube and pod lights on most bumpers and A-pillars without major modifications. UTVs and ATVs need compact pods or small bars suited to tight cage frames.
Why beam pattern matters more than raw lumens
Total lumen output is the number lighting vendors lead with because it’s easy to measure and impressive on paper. It’s also the least useful spec for predicting real-world performance on a trail.
The five beam patterns and when to use them
Spot: Narrow beam, typically around 10 degrees. Concentrates candela for maximum distance. Use it for 100+ foot visibility at speed on open roads or desert runs. Useless on tight technical trails where you need width, not distance.
Flood: Wide beam, typically 40 degrees or more. Spreads light across 20–30 feet of near-field terrain. Ideal for slow technical driving, campsite illumination, and ditch lighting. Loses distance fast.
Combo: Blends spot optics in the center with flood optics on the ends. The most practical choice for a primary bar because it covers both zones. Most bumper-mounted bars use this pattern.
Driving beam: Similar to spot but engineered specifically for road use, with controlled upward spill to reduce glare for oncoming traffic. The right choice when you want long-range visibility without blinding other drivers.
Ditch beam: Fires outward at an angle rather than straight ahead. Designed for A-pillar mounting to illuminate trail edges and corners. Not a forward light at all.
Photometrics: the specs that actually predict performance
Candela measures the intensity of light in a specific direction. A light with high peak candela will throw a beam farther than a light with the same total lumens but scattered output. Lux measures illuminance at a given distance, which tells you how much usable light actually hits the ground at 50 or 100 feet. Iso-lux charts map these values across the beam pattern, showing you exactly where the light is concentrated and where it falls off.
Vendors that publish iso-lux charts are giving you real data. Vendors that only publish total lumens are hiding the part that matters. A lower-lumen light with a controlled candela peak and stable beam will give more usable distance than a higher-lumen light with scattered output.
| Beam Type | Typical Angle | Effective Distance | Best Application |
|---|---|---|---|
| Spot | ~10° | 300+ ft | High-speed desert, open roads |
| Flood | ~40° | 20–30 ft | Technical trails, camp, ditch |
| Combo | ~10°–40° blended | 50–200 ft | General off-road, primary bar |
| Driving | ~12°–15° | 200 ft | Rural roads, highway driving |
| Ditch | ~45° lateral | 30–60 ft side | A-pillar corner visibility |
Color temperature also plays a role. Warm white at 3,000K and neutral tones at 4,000–5,000K perform better in dusty and foggy environments. Cool white above 6,000K looks impressive in clear conditions but scatters noticeably in particulates.
Pro Tip: When reviewing a vendor’s product page, scroll past the lumen number and look for a photometric chart or iso-lux diagram. No chart is a red flag. It usually means the optics aren’t worth documenting.
How to choose the right off-road lights before you buy
The decision flow is straightforward: match your light type and beam pattern to your driving style, then verify mounting, wiring, and durability specs before committing.
Decision flow:
- Identify your primary terrain and speed (high-speed open vs. slow technical vs. mixed)
- Choose light type based on that (bar for high-speed, pods for technical, combo for mixed)
- Select beam pattern (spot for distance, flood for near-field, combo for general use)
- Confirm mounting location and available hardware on your specific vehicle
- Size the wiring harness to the combined amp draw of your planned lights
The buying checklist
- Photometrics: Ask for candela/lux data and iso-lux charts before purchasing
- Optics quality: Precision-machined reflectors or projector lenses outperform basic parabolic housings
- IP rating: IP67 minimum for any light exposed to water crossings or pressure washing; IP68 for submersion-prone builds
- Thermal management: Look for aluminum die-cast housings with dedicated heat sinks; budget bars with plastic housings fail early from heat buildup
- Vibration rating: Lights mounted on bumpers and A-pillars take constant shock; check for vibration-tested ratings or ask the vendor
- Build materials: Die-cast aluminum housing, polycarbonate or tempered glass lens, stainless hardware
- Mounting hardware: Verify the bracket fits your specific bumper or mounting point; universal brackets often require modification
- Fitment kits: Manufacturer-published fit guides for your vehicle year, make, and model reduce installation errors
- Warranty length: Reputable brands offer 2–5 year warranties; lifetime warranties on budget lights are often unenforceable
- Seller support: Can you reach a human for fitment questions? Is there a documented returns process?
Pricing and installation time
| Category | Typical Price Range | DIY Install Time |
|---|---|---|
| Budget LED bar | lower-price range | modest DIY install time |
| Mid-range combo bar | moderate-price range | moderate DIY install time |
| Premium driving lights (pair) | higher-price range | modest DIY install time |
| Pod/cube set (pair) | moderate-price range | modest DIY install time |
| Full modular kit (bar + pods + harness) | higher price range | longer DIY install time |
KC HiLites, HELLA, and Baja Designs sit at the premium end of this range. KC HiLites is known for long-range driving lights and durable round units with strong warranty support. HELLA produces DOT-compliant auxiliary lights with well-documented photometrics and broad vehicle fitment coverage. Baja Designs builds race-proven lights with published iso-lux data and modular mounting systems, popular with high-speed desert and overland builders. All three publish photometric data and offer vehicle-specific fitment support.
Questions to ask before you buy
- Can you provide a photometric chart or iso-lux diagram for this specific SKU?
- What wire gauge and amp draw does the harness need to support?
- Are replacement lenses, drivers, or mounting hardware available separately?
- What does the warranty cover, and what documentation do you need for a claim?
- Is there a published fit guide for my vehicle year, make, and model?
Pro Tip: Prioritize optics and thermal management over headline lumen claims. A light that runs cool and throws a controlled beam at 200 feet beats a hot-running bar that claims twice the lumens but scatters them across the hood.
How to wire off-road lights without killing your alternator
Wiring is where most off-road lighting installs go wrong. Thin-gauge harnesses cause voltage drop, which dims output and generates heat. Poor relay installations cause intermittent failures. Both problems are avoidable with a proper dedicated harness.
Installation steps
- Mount the lights at the chosen location; confirm bracket fit and aim angle before running any wire
- Run the wiring harness from the light(s) to the battery, routing away from exhaust, moving parts, and sharp edges
- Install the relay and inline fuse as close to the battery as practical; fuse at the source, not at the switch
- Connect the switch trigger wire to the cab switch or a switched 12V source
- Ground the harness to a clean, bare-metal chassis point, not a painted surface
- Test output and aim before buttoning up; adjust aim angle with lights on
Parts you’ll need
- Pre-built relay harness: The fastest and most reliable option for most builds. Look for harnesses sized to your light’s combined amp draw. The Highway 22 modular wiring kit from Ozkonickustomz is a pre-built option designed for truck-mounted accessories with proper relay and fuse integration.
- Wire gauge: 14 AWG handles up to roughly 15 amps; 12 AWG for 15–20 amps; 10 AWG for 20–30 amps. Size to the combined draw of all lights on the circuit.
- Relay: A 30–40 amp relay for most single-bar setups; 40 amp for larger multi-light configurations
- Inline fuse: Fuse at the battery end of the positive wire, sized 10–20% above the circuit’s expected draw
- Connectors: Weatherproof Deutsch or equivalent connectors at all exterior junction points
- Corrosion management: Dielectric grease on all exposed terminals; heat-shrink butt connectors instead of bare crimp splices
Safety callouts
- Always fuse at the source, within 18 inches of the battery positive terminal
- Route harness away from exhaust manifolds, turbo pipes, and moving suspension components
- Secure harness every 12–18 inches with proper clamps; loose harness chafes through insulation
- Calculate total amp draw before adding lights; most stock alternators handle 60–80 amps of accessory load before affecting charging voltage
- Use independent switches for different lighting zones (primary bar vs. ditch pods vs. amber) to manage load and avoid drawing everything at once on long overland trips
The rear body light harness available at Ozkonickustomz demonstrates the kind of pre-terminated, vehicle-specific harness design that simplifies installation and reduces failure points.
Pro Tip: A quality pre-built harness with weatherproof connectors, a properly rated relay, and a fused positive lead eliminates the three most common wiring failure modes: voltage drop, connector corrosion, and relay burnout. DIY wiring with undersized wire and bare crimp connectors causes most of the failures that get blamed on the lights themselves.
Are your off-road lights street legal?
The short answer: it depends on the state, the mounting location, and whether the lights carry DOT/SAE markings. Getting this wrong means fines, failed inspections, and potential liability.
DOT/SAE vs. off-road-only
Lights marked “DOT” or “SAE” meet federal motor vehicle safety standards for road use. Lights marked “off-road use only” do not, and running them on public roads is illegal in every U.S. state regardless of mounting height. The marking is on the lens or housing; check it before you buy if street use is part of your plan.
State mounting-height rules
Most U.S. states enforce mounting-height limits commonly in the range of 16–42 inches from the ground for auxiliary forward-facing lights. Roof-mounted light bars almost always exceed these limits, which is why professionals recommend mounting primary lights at or below headlight level for both compliance and depth perception. West Virginia’s vehicle code, for example, explicitly requires roof-mounted off-road light bars to be turned off whenever the vehicle is operated on any public road or highway.
Compliance checklist
- Measure your mounting height from ground to center of the light housing; compare against your state’s vehicle code
- Confirm allowed colors: white and amber are universally permitted for forward-facing lights; red and blue are prohibited
- Count your forward-facing lamps; many states limit the total number of simultaneously illuminated forward lights
- Use opaque covers on off-road-only lights when driving on public roads; this is required in several states and strongly recommended everywhere else
- Aim all road-use lights below the horizontal plane to avoid blinding oncoming traffic
Legal note: State vehicle codes vary significantly. Check your state’s DMV or motor vehicle statutes directly, or consult a local enforcement authority, before running any auxiliary lighting on public roads.
Keeping your lights running: maintenance and troubleshooting
Good off-road lighting fails for predictable reasons. Most failures trace back to wiring, heat, or water, not to the LEDs themselves.
Routine maintenance schedule
- After every trip: Wipe lenses clean; mud and dust reduce output significantly
- Monthly: Check mounting fasteners for looseness from vibration; re-torque as needed
- Every 3 months: Inspect lens seals and housing gaskets for cracking or compression set; replace if compromised
- Every 6 months: Test aim angle; vibration shifts aim over time, especially on bumper-mounted lights
- Annually: Inspect all harness connections for corrosion; apply fresh dielectric grease to exposed terminals
Common failures and fixes
- Dim output: Usually voltage drop from undersized wiring or a corroded ground connection. Check wire gauge, measure voltage at the light under load, and clean or replace the ground point.
- Intermittent operation: Failed relay or loose connector. Swap the relay first; it’s the cheapest fix. Then check every connector in the harness for corrosion or incomplete seating.
- Water ingress: Cracked lens seal or a compromised housing gasket. Most IP67-rated lights can be resealed with a replacement gasket kit. Lights without replaceable seals are a design flaw.
- Early LED burnout: Almost always a thermal management failure. Budget bars with plastic housings trap heat; the LED driver degrades and the diodes fail early. Premium units with aluminum heat sinks run cooler and last longer.
- Loose or rattling housing: Vibration from rough terrain works fasteners loose. Use thread-locking compound on mounting bolts and check after the first few trail runs.
Warranty claims
Document the failure with photos before disassembly. Most reputable brands require proof of purchase, a description of the failure mode, and photos of the installation. Keep your original receipt and any fitment documentation. Brands like KC HiLites, HELLA, and Baja Designs have established warranty processes; budget brands often do not.
When the cost of repair approaches the cost of replacement, replace. LED drivers and optics assemblies are rarely worth sourcing for budget-tier lights.
Pro Tip: The Billet LED 3rd brake light in the Ozkonickustomz catalog is a good example of the kind of quality-controlled LED product where the housing, seal, and driver are built to last. That same standard applies when evaluating any auxiliary off-road light.
Why optics and modular systems beat raw lumen numbers
The most persistent mistake in off-road lighting purchases is treating total lumens as the primary performance metric. It’s understandable. Lumens are easy to compare, and vendors lead with them. But on a real trail, what matters is how much usable light hits the ground at the distance you need, not how much light the fixture produces in a lab.
Consider two lights: a 15,000-lumen budget bar with basic parabolic reflectors, and a 7,000-lumen precision-optic driving light with a controlled candela peak. On a desert run at 50 mph, the budget bar scatters its output across a wide, uneven pattern. The driving light concentrates its beam at 300+ feet with consistent lux values across the center. The driver with the lower-lumen light sees farther and reacts earlier.
Expert consensus from practitioners and industry commentary: Candela and iso-lux output are the most reliable buyer-side specs for comparing beam consistency and usable distance. Vendors that publish photometric charts provide transparency; those that don’t often have optics that aren’t worth documenting. Precision optics and controlled candela peaks matter more on-trail than total lumen ratings.
This is also why the modular upgrade path makes practical sense. Starting with a quality primary combo bar and adding zone-specific pods as your trails demand them means every dollar goes toward a known gap in your lighting system. You’re not guessing at a full kit upfront.
Ozkonickustomz supports this approach directly. The wiring kits, fitment parts, and modular accessories in the catalog are sourced from vetted manufacturers with documented compatibility. That matters when you’re adding a second lighting zone and need a harness that integrates cleanly with what’s already installed, rather than splicing into an existing circuit and hoping the gauge holds.
Pro Tip: Before purchasing any off-road light, ask the seller for iso-lux charts and the wiring harness amp draw specification. If they can’t provide both, that’s the answer you need.
Key Takeaways
The single most important rule in off-road lighting: match beam pattern and optics quality to your driving use-case, then verify wiring, fitment, and legal compliance before you buy.
| Point | Details |
|---|---|
| Optics over lumens | Candela and iso-lux output predict real-world performance better than total lumen ratings. |
| Match type to terrain | Combo bars for high-speed open terrain; flood pods for slow technical trails; amber for dust and fog. |
| Wire it right | Use a dedicated, fused relay harness sized to your combined amp draw to prevent voltage drop and heat failures. |
| Check legal compliance | Most U.S. states restrict mounting heights to roughly 16–42 inches; roof bars are typically off-limits on public roads. |
| Ozkonickustomz fitment | Ozkonickustomz stocks compatible wiring harnesses, relay kits, and fitment parts for truck, Jeep, and UTV builds. |
The case for building your lighting system the right way
The off-road lighting category is full of impressive-sounding specs and low prices that don’t survive contact with a real trail. What we’ve seen consistently is that buyers who focus on optics quality, proper wiring, and modular expansion end up with systems that actually work, rather than lights that look great in the driveway and fail six months later.
The recommendation here isn’t complicated: start with a quality primary light that has documented photometrics, wire it with a properly rated harness, and add zone-specific lights as your driving demands them. That approach costs less over time, installs more cleanly, and gives you a rig you can actually trust in the dark.
If you have fitment questions, need help matching a harness to your specific vehicle, or want to confirm compatibility before ordering, Ozkonickustomz is set up to help with exactly that. The catalog is built around vetted, compatible parts, and the support team can assist with part lookups and installation questions.
Get the right wiring kit and fitment parts from Ozkonickustomz
Knowing what to buy is half the job. Having the right parts in hand when you start the install is the other half.
Ozkonickustomz stocks the Highway 22 modular wiring kit for truck-mounted lighting setups, a pre-built harness with proper relay and fuse integration that eliminates the most common installation failures. It’s the kind of part that makes a bumper-mounted combo bar or a dual-pod ditch light setup go in cleanly the first time, without undersized wire or improvised relay mounting.
For round driving light fitment on classic and custom builds, the Snake Eye 7-inch lens assembly with H4 covers vehicles where modern pod-style lights don’t fit the mounting geometry. Every part ships with documented fitment compatibility, and the returns process is straightforward if something doesn’t fit.
Browse the full lighting and wiring catalog at Ozkonickustomz, or reach out directly for fitment help before you order. Fast shipping, real support, and parts sourced from vetted manufacturers.
Useful sources and further reading
These sources back the technical claims in this guide and are worth bookmarking for your own research.
- SEMA (Specialty Equipment Market Association): The primary U.S. industry body for aftermarket automotive parts. Use it to verify DOT/SAE standards, product compliance requirements, and industry news relevant to off-road lighting.
- Beam Pattern Explained: Spot, Flood, Combo and Driving Beams (HIBANA): Engineering-focused breakdown of beam patterns, mounting height considerations, and how to match beam type to driving environment. Useful for understanding photometric terms before reading vendor spec sheets.
- Off-Road Lighting 101: Lumens, Beam Patterns, and Why Cheap LEDs Cost You More (4WD Talk): Covers why candela and iso-lux matter more than total lumens, thermal management, and color temperature guidance for dusty conditions.
- Choosing the Right Off-Road Lighting (Those Guys Garage): Practical installer perspective on modular setups, wiring harness sizing, and use-case-based light selection for trucks and UTVs.
- Are Your Off-Road Lights Legal? A Guide to Roof Light Regulations (WAAG 4x4): State-by-state overview of mounting-height rules and on-road use restrictions for auxiliary lights. Start here before finalizing any roof or high-mount installation.
- State DMV and vehicle code resources: For your specific state’s mounting-height limits, permitted colors, and auxiliary lamp count restrictions, go directly to your state’s DMV website or motor vehicle statutes. Rules vary enough that a general guide is not a substitute for the actual code.
- Manufacturer fitment guides: KC HiLites, HELLA, and Baja Designs all publish vehicle-specific fitment guides and photometric data. Use these alongside the Ozkonickustomz product pages to confirm compatibility for your year, make, and model.
If you’re deciding whether to upgrade your truck’s lighting before selling or trading it, the team at Kamocars covers how aftermarket modifications affect truck value and buyer expectations, which is useful context for any build investment decision.