Buy a matched swap kit from a single vendor when you want predictable fitment and minimal fabrication time. That’s the short answer for most builders. If you’re an experienced fabricator working a custom build with tight clearances or unusual chassis geometry, sourcing individual parts gives you more control but demands more planning. Either way, three steps get you moving: confirm your engine generation (Gen III, Gen IV, or LT), identify your chassis family, then decide kit versus individual parts.
- Step 1: Pull your engine’s casting code or VIN tag to confirm generation before ordering anything.
- Step 2: Match your chassis to a category (classic A-body/F-body, OBS truck, late-model truck/4x4, or small import platform) so you know which mount and oil pan geometry applies.
- Step 3: Call or email vendor tech support before placing a large order. A five-minute conversation about your pan/mount/header combo can save weeks of returns.
Lead times on complete kits typically run 1–6 weeks depending on the supplier and whether components are in stock. Individual parts can ship faster but require you to verify compatibility across multiple vendors yourself.
Table of Contents
- What LS swap parts do you actually need to buy?
- Gen III vs Gen IV vs LT: which generation affects your parts list most?
- Complete swap kits vs individual parts: how do you decide?
- What causes fitment failures, and how do you avoid them?
- How do you pick a vendor that won’t waste your time or money?
- What parts do you need for each common chassis type?
- What does a typical LS swap cost, and how long does shipping take?
- How long does an LS swap actually take, start to finish?
- Key Takeaways
- The part most builders underestimate
- Ozkonickustomz has the parts your swap actually needs
- Useful sources and build references
What LS swap parts do you actually need to buy?
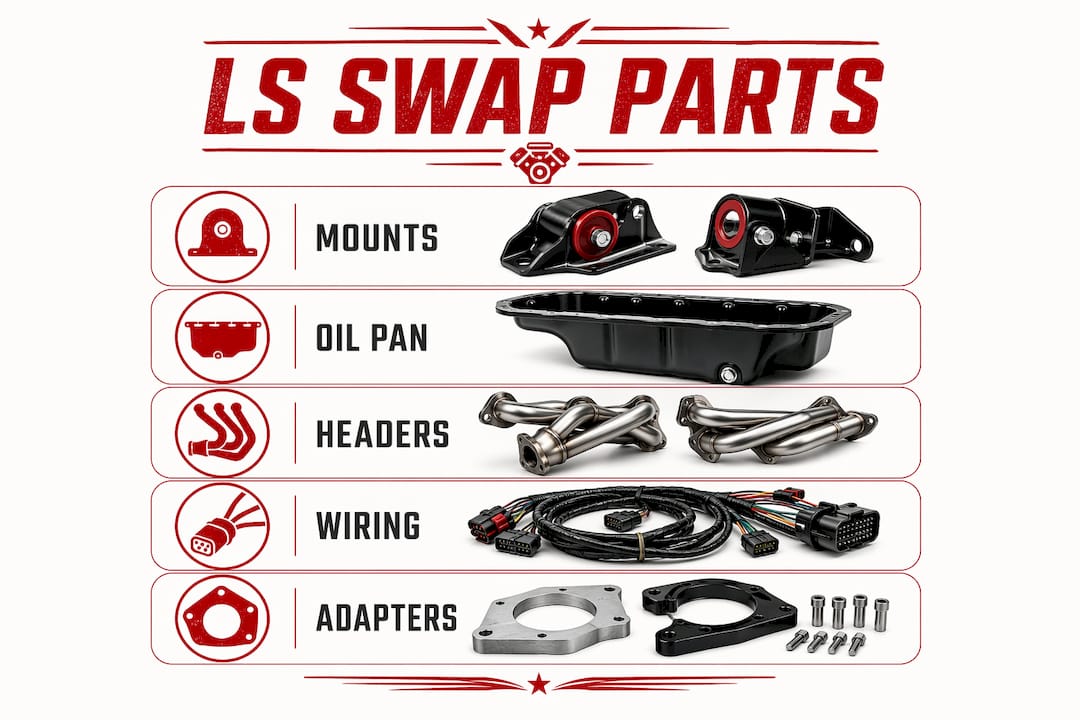
The parts taxonomy for an LS swap breaks into roughly a dozen categories. Miss one and you’re making a parts-store run mid-build.
| Category | Common Part Examples | Notes |
|---|---|---|
| Motor mounts & adapters | Clamshell mount kit, flat-plate adapter, frame-rail brackets | Must match oil pan style |
| Oil pan & pickup | Low-profile sheetmetal pan, cast rear-sump pan, filter adapter | Chassis clearance determines style |
| Headers & exhaust | Long-tube swap headers, shorty headers, collector reducers | Must clear steering and crossmember |
| Wiring harness & ECM | Standalone engine harness (CAN-free option), OEM PCM with tune | Biggest electrical decision in the swap |
| Transmission adapter/crossmember | 4L60E crossmember, 4L80E crossmember | Tunnel clearance varies by chassis |
| Bellhousing & flexplate | LS-pattern bellhousing, 6-bolt or 8-bolt flexplate | Bolt count differs Gen III/IV vs LT |
| Sensors & connectors | Coolant temp, oil pressure, O2 sensors, MAP sensor | Some OEM sensors reuse; others need adapters |
| Accessory drive (FEAD) | Mid-mount accessory kit, serpentine bracket kit, A/C delete pulley | LT requires different bracket geometry |
| Fuel system | High-pressure in-tank pump, AN fuel lines, return-style regulator | LT direct injection needs higher pressure |
| Cooling | Aluminum radiator, electric fan kit, upper/lower hoses | Size to the engine’s BTU output |
| Driveline | Shortened driveshaft, CV axle adapters (IRS applications) | Usually custom-length per chassis |
The wiring harness is where most first-timers underestimate complexity. A standalone harness with a CAN-free option simplifies the install dramatically because you don’t need to integrate the factory body-control module. For truck builds, a modular wiring kit designed specifically for LS applications can cut installation time significantly.
Pro Tip: Sourcing mounts, oil pan, and headers from the same engineered kit is the single most effective step to avoid clearance problems. Mixing brands across those three components is where most fitment headaches start.
Gen III vs Gen IV vs LT: which generation affects your parts list most?
The generation of your engine changes which parts you can bolt on and which require adapters or custom fabrication. Get this wrong and you’re returning parts.
Gen III (1997–2007, e.g., LS1, LS6, LQ4, LQ9): The most swap-friendly generation. Largest aftermarket catalog, widest chassis compatibility, and the simplest accessory drive. Six-bolt crank flange, rear-sump oil pan on most truck variants, and no direct injection means a conventional returnless or return-style fuel system works fine.
Gen IV (2005–2013, e.g., LS2, LS3, LS7, L92, L96): Shares the same basic architecture and bellhousing bolt pattern with Gen III, so most swap mounts and crossmembers carry over. Key differences: some Gen IV engines use Active Fuel Management (AFM) and Variable Valve Timing (VVT), which require compatible tune files and may need AFM delete kits for reliability. The LS3 and L92 use a different intake port shape (rectangular vs cathedral), which matters for intake manifold swaps but not for the physical swap itself.
Gen V LT (2014–present, e.g., LT1, LT4, L83, L86): Gen V LT engines introduced direct injection, which pushes fuel-system requirements to 2,000+ PSI at the injectors via a high-pressure pump driven off the cam. That alone adds cost and complexity. The accessory drive relocated, bellhousing bolt pattern changed, and some crank flange dimensions differ. LT engines are lighter and more powerful, but the parts ecosystem is smaller and the swap cost is higher.
Quick compatibility checklist before you order:
- Confirm crank bolt count: Gen III/IV use a 6-bolt crank flange; some LT applications differ.
- Check bellhousing bolt pattern: Gen III/IV share a pattern; LT does not always match.
- Identify intake port style (cathedral vs rectangular vs LT-specific) for any intake manifold decisions.
- Verify whether your engine has AFM/VVT and whether your tune supports it or deletes it.
- For LT: budget for a direct-injection high-pressure fuel pump and compatible injectors.
- Check casting codes on the block (stamped near the bellhousing flange) to confirm exact variant.
LS engines have a larger aftermarket support base, making swaps more accessible for most projects. LT brings modern efficiency and output, but adds direct-injection and accessory-drive complications that push the parts budget and fabrication time up.
Complete swap kits vs individual parts: how do you decide?
Matched kits make sense when you’re doing your first swap, working against a deadline, or want a documented fitment guarantee. Aftermarket swap kits for most common chassis bundle the mechanical parts needed to seat an LS in a classic or modern chassis, and the components are engineered to work together.
Individual parts make sense when you have a non-standard chassis, need custom header routing, or are building a high-horsepower application where specific component choices matter more than convenience.
| Criteria | Complete Kit | Individual Parts |
|---|---|---|
| Fitment predictability | High — components engineered together | Variable — depends on your research |
| Cost profile | Higher upfront, fewer surprises | Lower per-part, but hidden costs add up |
| Lead time | 1–6 weeks for full kit | Faster per item, but multiple orders |
| Customizability | Limited to kit options | Full control |
| Warranty/returns | Single vendor, simpler process | Multiple vendors, more complexity |
| Tech support | Usually included | Varies by vendor |
| Best for | First-time swaps, tight timelines | Experienced builders, custom clearances |
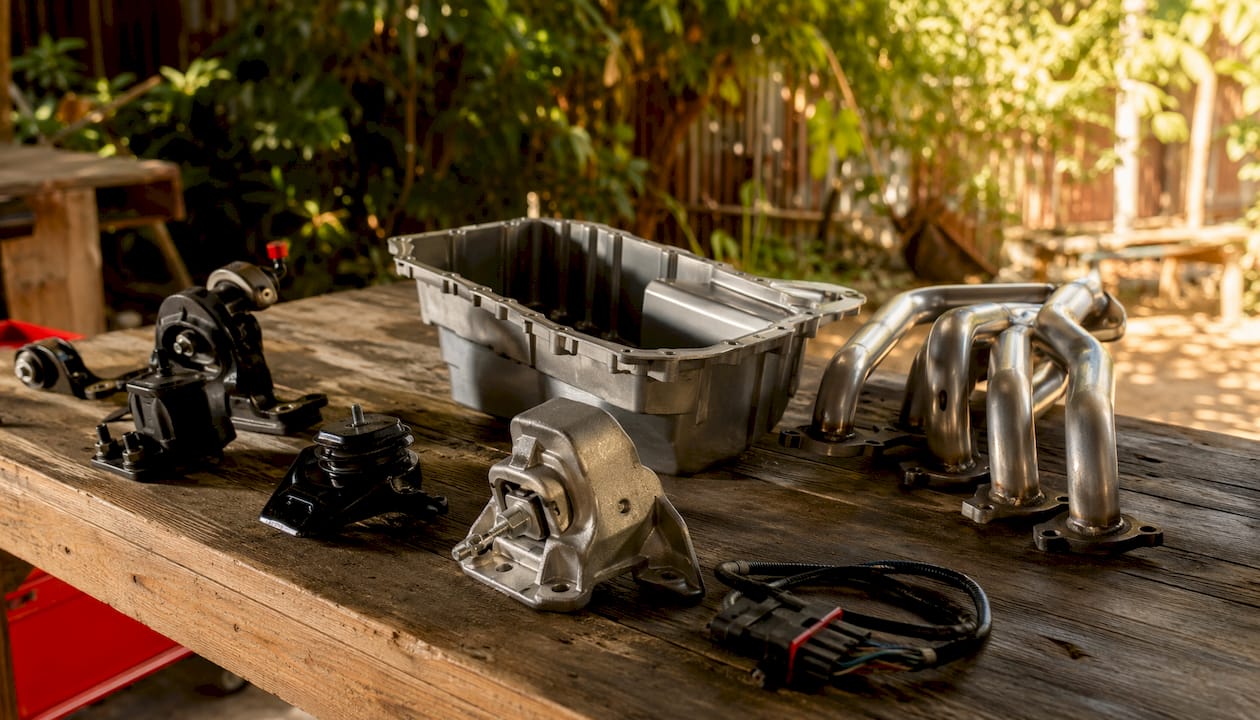
A typical complete kit includes: motor mounts, oil pan and pickup tube, headers, crossmember, transmission mount, and sometimes a wiring harness. Fuel system components, FEAD kits, and radiators are usually optional add-ons.
Before you buy a kit, verify:
- The kit explicitly lists your chassis year and model in its fitment notes.
- Headers and oil pan are included (not just mounts and crossmember).
- The kit specifies which transmissions it supports.
- A fitment guarantee or documented return policy covers incorrect fitment.
What causes fitment failures, and how do you avoid them?
The most common cause of a failed LS swap isn’t a bad part. It’s mixing components from different vendors without verifying that they were designed to work together. Even “bolt-in” claims can require minor hammering, spacer plates, or tunnel work on certain chassis and transmission combinations.
The four most frequent fitment failure points:
- Wrong oil pan/mount combo. Cast and sheetmetal pans have different clearance profiles. Clamshell mounts place the engine higher than flat-plate adapters, which changes how the pan sits relative to the crossmember. Matching pan type to mount style is not optional.
- Driveline angle errors. Target a 1.5–2-degree downward angle at the transmission output. Too steep and you’ll fight vibration at highway speed. Measure before you weld the crossmember.
- Header clearance to steering and crossmember. Long-tube headers on early A-body and F-body cars frequently conflict with the steering shaft or crossmember. Confirm header dimensions against your specific chassis before ordering.
- Transmission tunnel clearance. Modern transmissions like the 4L80E often require crossmember modifications or fabricated crossmembers to fit under older floorpans. The 4L80E is physically larger than the 4L60E; budget for tunnel work if you’re going that route.
Sheetmetal oil pans generally clear crossmembers better than cast pans in early muscle car applications. Clamshell mounts work well with cast pans but raise the engine, which can create hood clearance problems on low-hood cars. Flat-plate adapters keep the engine lower and pair more naturally with sheetmetal pans.
Pro Tip: Before ordering, ask your vendor for clearance drawings and part numbers for their matched mount/pan/header setups. A vendor that can’t provide this documentation is a vendor worth skipping.
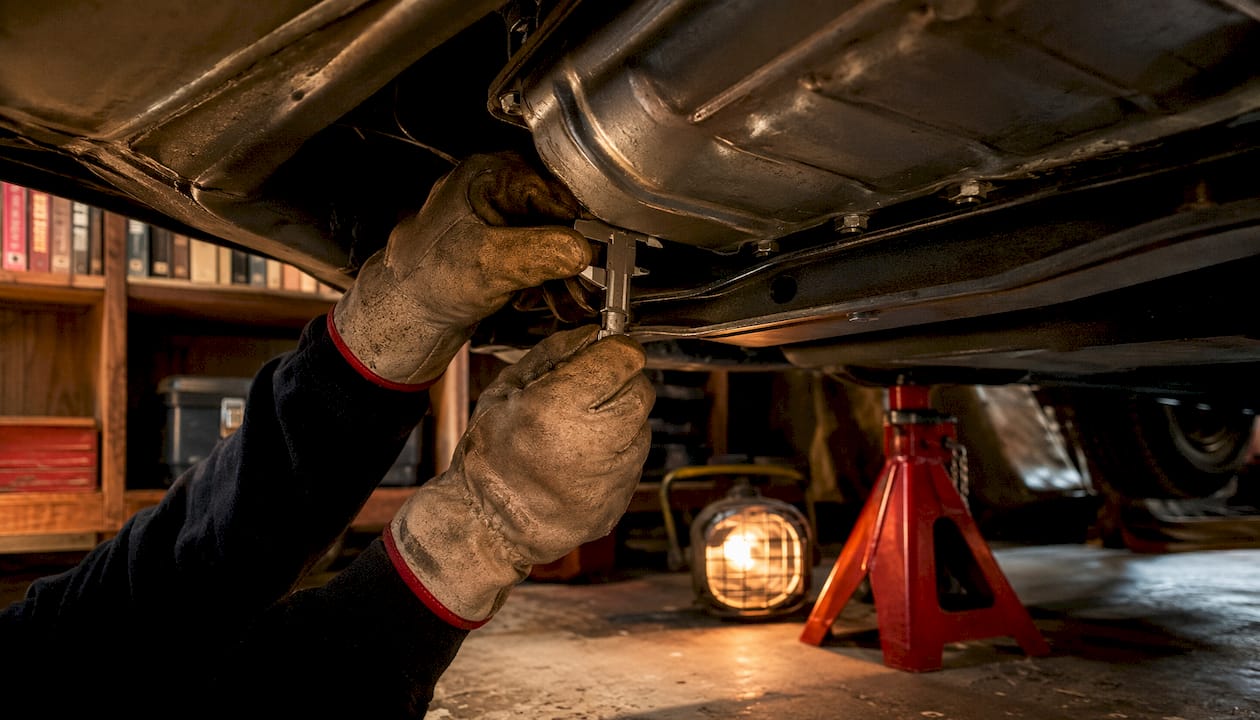
For hands-on guidance on installation steps, Ozkonickustomz publishes a header installation guide that covers clearance checks and routing decisions specific to small-block Chevy platforms.
How do you pick a vendor that won’t waste your time or money?
Lead with this: a vendor that publishes vehicle-specific fitment notes, downloadable spec sheets with part numbers, and a clear return policy is worth paying a small premium for. The alternative is a cheap kit with no documentation and a 30-day return window that expires while you’re still test-fitting.
Vendor evaluation checklist:
- Phone or live tech support. Call before you order. Ask specifically about your pan/mount/header combo and your transmission choice. A vendor that can answer those questions confidently has done the work.
- Documented fitment guarantee. Not just “fits most LS swaps” but a specific year/make/model list.
- Part-numbered fitment guides. Downloadable PDFs with actual part numbers let you cross-reference and verify.
- Manufacturing standards. OEM-vetted or made-in-USA manufacturing reduces the risk of dimensional inconsistencies that cause fitment problems.
- Visible lead times. A vendor that lists current stock status and realistic ship dates is operating transparently.
- Return and warranty policy. Confirm the window and whether fitment-related returns are covered.
Complete kits typically ship in 1–6 weeks. Individual parts can arrive faster, but you’re managing multiple vendors and multiple return policies if something doesn’t fit. For ECM tuning, a service like LS email tuning from a dedicated calibration shop handles the tune remotely, which is worth factoring into your vendor plan alongside your parts suppliers.
For guidance on evaluating aftermarket parts quality and warranty implications, the Ozkonickustomz performance parts shopping guide covers what to look for in fitment notes and return policies.
What parts do you need for each common chassis type?
The checklist below is organized by chassis family. Buy mounts, oil pan, and headers first. Wiring harness, crossmember, and transmission mount come next. Fuel system, FEAD, and cooling can follow once the engine is physically positioned.
| Chassis Family | Mount Kit | Oil Pan Style | Header Type | Crossmember/Trans Mount | Harness Type | Fuel System Notes |
|---|---|---|---|---|---|---|
| Classic A-body (Chevelle, El Camino) | Clamshell or flat-plate | Sheetmetal low-profile | Long-tube (steering clearance critical) | Fabricated or kit crossmember | Standalone CAN-free | Return-style |
| Classic F-body (Camaro, Firebird) | Clamshell or frame adapter | Sheetmetal or cast (verify) | Long-tube (steering shaft clearance) | Kit crossmember, 4L60E | Standalone or OEM PCM | Return-style |
| OBS Truck (C/K) chassis | Frame-rail adapter | Rear-sump truck pan | Shorty or long-tube | OEM-style or kit crossmember | OEM PCM or standalone | Returnless or return |
| Late-model truck/4x4 (truck years before 2008) | Direct-fit or adapter | Rear-sump or sheetmetal | Shorty preferred | Kit crossmember | OEM PCM preferred | Returnless |
| Small car / compact platform | Custom or universal | Low-profile sheetmetal | Tight-clearance shorty | Fully fabricated | Standalone CAN-free | Return-style |
Per-chassis notes worth knowing:
- A-body cars often need the floor tunnel modified for a 4L80E; the 4L60E fits with less cutting.
- Early F-body steering linkage conflicts with many long-tube headers; confirm header dimensions against your specific year before ordering.
- OBS trucks are among the most straightforward LS swap platforms; many parts fit with minimal modification.
- Small car platforms (think Miata, S10, or similar) almost always require fully fabricated crossmembers and custom driveshafts.
Order priority: mounts and oil pan first (they determine engine position), then headers (confirm clearance with pan and mount in place), then crossmember and transmission mount, then wiring harness, then fuel system and cooling.
What does a typical LS swap cost, and how long does shipping take?
Cost ranges vary widely depending on engine source, kit completeness, and chassis complexity. Here’s a realistic breakdown for a Gen III/IV swap using a junkyard or pull-out engine:
- Engine (used LS, e.g., LQ4 or LS1): $500–$2,500 depending on mileage and source
- Complete mechanical swap kit (mounts, pan, headers, crossmember): $800–$2,500
- Standalone wiring harness: $400–$1,200
- ECM/PCM and tune: $300–$800 (more for a custom dyno tune)
- Fuel system (pump, lines, regulator): $200–$600
- Cooling (radiator, fans, hoses): $300–$800
- Driveshaft modification: $150–$400
- Miscellaneous hardware, sensors, fittings: $200–$500
A complete Gen III/IV swap on a common chassis (OBS truck, classic A-body) typically runs several thousand dollars in parts before labor. LT swaps add cost for the direct-injection fuel system and accessory drive differences.
Shipping and lead times: In-stock individual parts from U.S. vendors typically ship within 1–5 business days. Complete kits, especially those built to order, run 1–6 weeks. Custom fabricated crossmembers or one-off headers can take 4–8 weeks. Order mounts, pan, and headers first so you can confirm fitment while other parts are in transit.
How long does an LS swap actually take, start to finish?
The timeline below assumes a first-time builder with a helper, a common chassis (OBS truck or classic A-body), and a Gen III/IV engine. Experienced builders with a lift and prior swap experience can compress this significantly.
Week 1–2: Parts sourcing and delivery Order mounts, oil pan, and headers first. While those ship, source your engine and confirm transmission choice. Order wiring harness and crossmember once engine position is confirmed from the mount kit specs.
Week 2–3: Engine removal and chassis prep Pull the original engine and transmission. Clean the engine bay. Inspect and repair any rust or structural issues in the frame rails and crossmember area. This is the right time to address fuel lines, brake lines, and any wiring that runs through the engine bay.
Week 3–4: Engine installation and mechanical fit Drop the LS in with mounts. Confirm oil pan clearance to crossmember and steering. Install headers and verify clearance to steering shaft, crossmember, and firewall. Set driveline angle and install crossmember and transmission mount.
Week 4–5: Wiring and fuel system Install standalone harness or adapt OEM PCM harness. Route fuel lines, install high-pressure pump, and plumb the fuel system. Connect cooling system, install radiator and electric fans.
Week 5–6: Tuning and startup Load a base tune onto the ECM. Verify oil pressure, coolant temp, and fuel pressure at idle. Address any vacuum leaks or sensor faults. Road-test and refine tune. A remote email tune from a calibration specialist can handle this phase without a dyno visit.
Week 6–8: Finishing and detail work Exhaust routing, air intake, accessory drive completion, and any remaining electrical work (gauges, A/C, power steering). First real drive and shakedown.
Most first-time builders complete a straightforward swap in 6–10 weekends of focused work. Complex chassis or LT engine swaps add 2–4 weeks minimum.
Key Takeaways
Matched kits from a single vendor reduce fitment risk more than any other single decision in an LS swap, making them the right starting point for most builders.
| Point | Details |
|---|---|
| Confirm engine generation first | Gen III/IV and LT differ in bellhousing, fuel system, and accessory drive; get this wrong and parts won’t fit. |
| Match mounts, pan, and headers | Sourcing these three from the same kit eliminates the most common clearance failures. |
| Call tech support before ordering | A five-minute pre-order call about your specific chassis and transmission saves weeks of returns. |
| Budget realistically | A complete Gen III/IV swap on a common chassis typically runs $3,500–$8,000 in parts before labor. |
| Ozkonickustomz for vetted swap parts | Ozkonickustomz sources directly from vetted manufacturers with documented fitment notes, phone support, and straightforward returns. |
The part most builders underestimate
The conventional wisdom on LS swaps focuses on the engine itself: which variant, what displacement, how much power. That’s the wrong place to spend your mental energy first. The engine is the easy part. What actually determines whether your swap goes smoothly or turns into a six-month nightmare is the three-part combination of mount, oil pan, and headers, and whether those three components were designed to work together in your specific chassis.
Builders who source those three items from the same engineered kit consistently have fewer fitment problems than builders who mix and match from different vendors, even experienced ones. The geometry is interdependent. The mount determines engine height. Engine height determines pan clearance. Pan clearance determines which headers will fit without hitting the steering shaft or crossmember. Change one variable and the others shift.
The other thing worth saying plainly: “bolt-in” is a marketing term, not a guarantee. Every chassis has quirks. Even the most popular swap platforms have known variations between model years that require minor modification. Plan for it, budget a few extra hours, and don’t let it surprise you.
Ozkonickustomz has the parts your swap actually needs
Ozkonickustomz sources swap-ready components directly from vetted manufacturers, with documented fitment notes for common chassis families and phone support to match parts to your specific build before you order. No guessing whether the pan clears the crossmember. No chasing returns across three different vendors.
The catalog includes wiring solutions like the Highway 22 modular wiring kit for truck-based swaps, plus hardware, fittings, and performance components backed by straightforward return policies and real technical assistance. Every order ships with the fitment documentation you need to verify compatibility before you cut or weld anything.
Have your engine casting code, target transmission, and chassis year ready, then reach out to Ozkonickustomz for a parts match. The team can confirm which mount/pan/header combination fits your build and flag any chassis-specific considerations before your order ships.
Useful sources and build references
These references cover fitment charts, generation identification, and build how-tos. Use them alongside vendor tech support, not as a substitute for it.
- Restomod Academy LS Swap Guide: Comprehensive overview of kit contents, parts categories, and the case for matched kits. Start here for a first-time swap overview.
- Flag Motorsports: Identifying LS/LT Generations: Use this to confirm your engine generation from casting codes and VIN tags before ordering any parts.
- DrivingLine: LS vs LT Swap Comparison: Practical breakdown of why LS (Gen III/IV) is easier for most swaps and where LT adds complexity.
- OnAllCylinders: LS Oil Pan and Motor Mount Guide: Detailed pan/mount compatibility for early muscle cars; essential reading before ordering for A-body and F-body applications.
- SlashGear: Essential LS Swap Parts: Good checklist reference and honest about fabrication time even on “bolt-in” kits.
- Ozkonickustomz: How to Install Performance Parts at Home: Step-by-step installation guidance and tools list relevant to swap component installation.
- Ozkonickustomz: Header Installation Guide: Clearance checks and routing decisions for small-block Chevy header installs; directly applicable to LS swap header fitment.
How to use these: Pull the generation ID guide before you order anything. Use the oil pan/mount guide to confirm your pan style against your mount choice. Call vendor tech support with specific part numbers from the fitment guides in hand. That combination of research plus a direct tech conversation is what separates a smooth swap from a parts-return cycle.