Start with a complete take-out LS truck engine — 4.8L, 5.3L, or 6.0L — pulled from a GMT800 or GMT900 donor vehicle, and buy it with the original wiring harness, sensors, and ECM still attached. That single decision eliminates more headaches than any other choice in this build. Pair it with a purpose-built 73–87 C10 LS swap kit that covers motor mounts, transmission crossmember, and an oil pan sized for the Squarebody frame, and you have the foundation of a clean, reliable conversion.
The absolute must-haves that should arrive before anything else:
- Motor mounts (C10-specific, LS-pattern)
- Transmission crossmember (aftermarket preferred for dual exhaust clearance)
- Oil pan with C10-compatible drop height (Holley 302-1 or 302-2 style)
- Wiring harness and matching ECM (from the donor or an OEM-style rework)
- LS-specific headers sized for Squarebody frame rails
- High-pressure in-tank fuel pump and upgraded feed lines
- Aluminum radiator with electric fan shroud
Pro Tip: Order the motor mounts, crossmember, and oil pan as a matched set before the engine arrives. Swapping an oil pan after the engine is sitting in the frame costs you a full day you did not budget.
Table of Contents
- What makes the 73–87 C10 different from a generic LS swap?
- Which LS engine is the right choice for a 73–87 C10?
- How do motor mounts and crossmembers affect your driveline position?
- Why oil pan selection has to happen before the engine goes in
- Shorty vs long-tube headers — what actually fits in a Squarebody?
- Cooling system requirements for an LS-swapped C10
- Fuel system upgrades your LS engine actually needs
- Wiring harness and ECM: take-out harness vs aftermarket standalone
- Accessory brackets, alternator, A/C, and power steering
- Tools and shop resources you need before starting
- Full C10 LS swap parts checklist — buy-ready with fitment notes
- How long does a C10 LS swap take, and what does it cost?
- How Ozkonickustomz sources and verifies parts for C10 LS swaps
- Key Takeaways
- The lesson most builders learn the hard way
- Ozkonickustomz has the swap parts your C10 build needs
- Primary sources and further reading
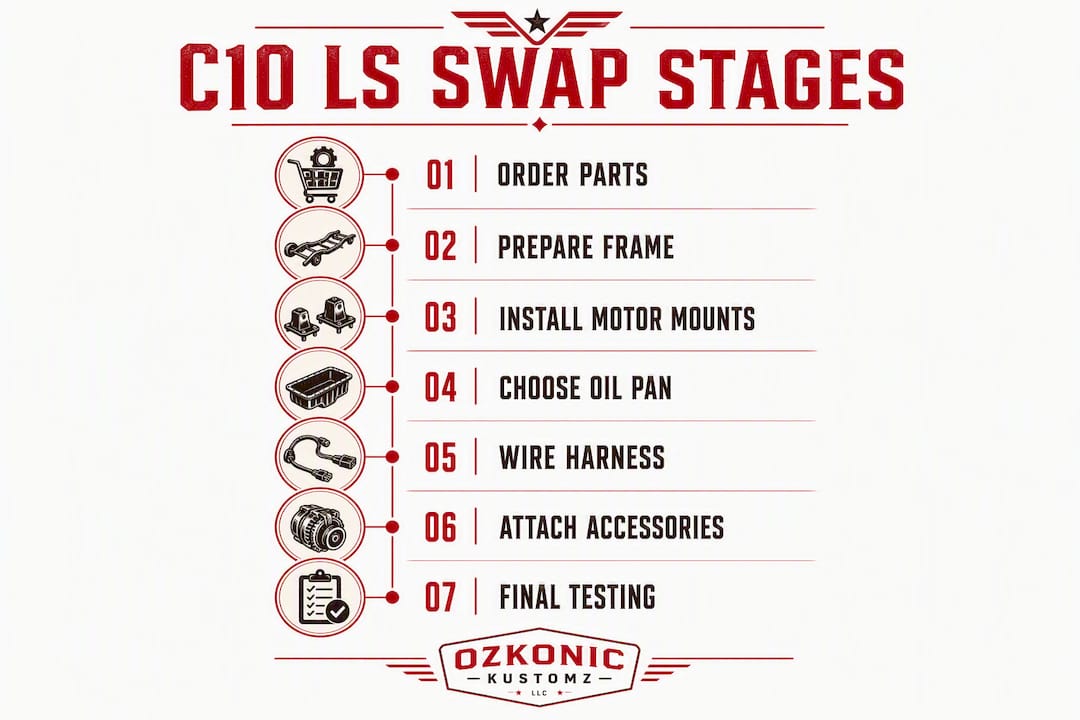
What makes the 73–87 C10 different from a generic LS swap?
The Squarebody C10 has a few quirks that turn a straightforward LS conversion into a fitment puzzle if you go in unprepared. The frame rails are wide enough to accept the LS block without modification, but the crossmember placement, oil pan depth, and steering box location all create interference points that generic swap kits ignore.
Key fitment considerations specific to the 73–87 platform:
- 2WD vs 4WD crossmember height: 2WD trucks sit lower relative to the frame, so the factory crossmember leaves almost no clearance for a full-depth LS truck pan. 4WD trucks have more vertical room but introduce transfer case alignment concerns.
- Lowered trucks: Drop spindles or lowering blocks push the frame closer to the ground, which compounds the oil pan problem. A lowered 2WD C10 almost always needs an aftermarket crossmember and a shallow-sump pan.
- Driveshaft length: The LS engine sits slightly farther forward than the original SBC in most mount kits, which shortens the required driveshaft by roughly 1–2 inches. Have a driveline shop measure and balance before first start.
- Radiator mounting: The LS water pump outlet sits differently than an SBC pump. Measure hose routing before ordering a radiator, or you will be cutting and re-routing.
- A/C bracket clearance: Stock GM truck A/C brackets on the LS engine often conflict with the C10’s inner fender and steering box. Plan this before the engine drops in.
- Brake compatibility: The C10’s original brake booster and master cylinder are usually retained, but confirm vacuum source. LS engines use manifold vacuum; a remote vacuum pump is an option if you go with a cam that kills idle vacuum.
Pro Tip: If you plan to run A/C, mock up the compressor and bracket position before welding any mounts. An inch of fore/aft engine position can mean the difference between a clean install and a bracket that hits the inner fender.
Which LS engine is the right choice for a 73–87 C10?
The answer depends on what you want the truck to do. Here is a straight comparison of the most common candidates:
| Engine | Displacement | Typical Power (stock) | Best Use Case | Notes |
|---|---|---|---|---|
| 4.8L LR4 | 4.8L | — | Budget daily driver | Lowest cost donor; less torque than 5.3 |
| 5.3L LM7 | 5.3L | — | Best all-around C10 choice | Abundant, affordable, strong low-end torque |
| 6.0L LQ4/LQ9 | 6.0L | — | Towing, performance baseline | Iron block; heavier but stout |
| LS1 (aluminum) | — | — | Performance/resto-mod | Lighter; requires more wiring work if not from a truck donor |
| LS3 | — | — | High-performance builds | Expensive; tall intake can clear hood with planning |
The 5.3L is the default recommendation for most C10 builds. Junkyards are full of them from 1999–2007 Silverados and Tahoes, prices are reasonable, and the torque curve suits a truck that weighs 3,600–4,000 lbs. The 6.0L LQ4 is the upgrade path for anyone who tows or wants a stronger foundation for future power adders.
Why truck LS engines beat car-sourced units for this application:
- Truck accessory brackets bolt directly to common C10 aftermarket bracket kits
- Iron-block 6.0L units tolerate heat and abuse better in a work truck context
- Truck ECMs are already tuned for the torque converter and transmission combinations most builders use
As Tejas SteelWorks documents in their LS swap guide, buying a complete take-out truck engine with its harness and ECM intact keeps the unknowns to a minimum and cuts tuning costs significantly.
One fitment caveat worth repeating: tall intakes, supercharger hats, and high-rise carb-style throttle bodies on LS engines can push total height past the C10’s hood clearance. Measure from the top of the throttle body to the bottom of the hood before committing to any forced induction setup.
How do motor mounts and crossmembers affect your driveline position?
Engine placement in the C10 frame is not arbitrary. Where the mounts put the engine determines transmission position, driveshaft angle, exhaust collector location, and whether your oil pan clears the crossmember. Get this wrong and you are pulling the engine back out.
Mount and crossmember options:
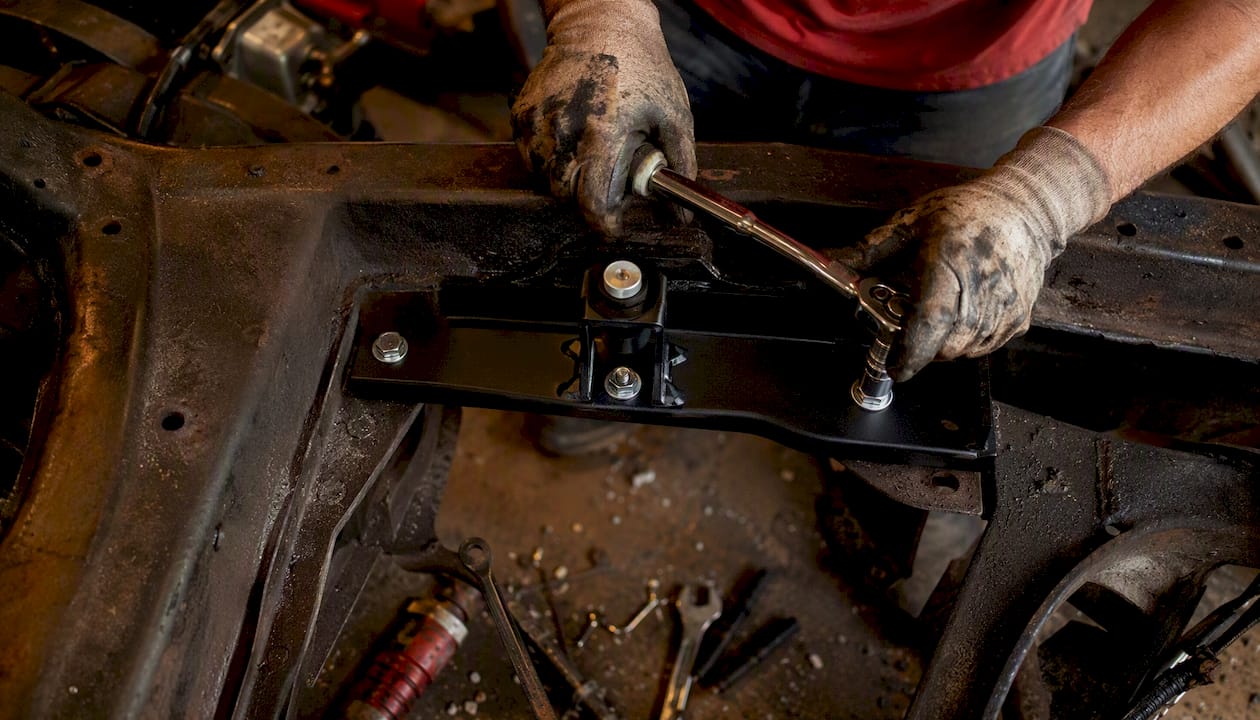
- Clamshell-style adapter mounts bolt to the LS block’s factory mount bosses and drop into the C10 frame pads. They position the engine at the correct fore/aft location for the stock transmission crossmember, which matters for driveshaft length.
- Complete engineered kits (mounts + crossmember designed together) are the cleaner path. ChevyDIY’s C10 LS install guide confirms that matched kits reduce trial fitting and integrate cleanly with headers and transmissions.
- Aftermarket crossmembers open up dual exhaust routing that the factory crossmember blocks. For lowered trucks, an adjustable or relocated crossmember is often the only way to get the pan and exhaust to coexist.
Driveshaft considerations:
- Most LS mount kits move the engine forward slightly, shortening the required driveshaft by 1–2 inches.
- A 3.5-inch diameter driveshaft handles the torque of a stock or mildly built LS without issue.
- If you pull the driveshaft from the donor truck, have a local driveline shop cut and balance it to the new length. Do not skip the balance step.
Pro Tip: Before welding or drilling anything, drop the engine in on the mounts with the transmission attached and check oil pan clearance, exhaust routing, and driveshaft angle simultaneously. One mock-up session catches problems that cost days to fix after the fact.
Why oil pan selection has to happen before the engine goes in
Oil pan selection is the single biggest physical-fit decision in a C10 LS swap, and it must be made before the engine drops into the frame. Changing pans after fitment means pulling the engine, which costs time and money you did not plan for.
Factory LS truck pans hang deep. On a stock-height 2WD Squarebody, the standard truck pan will contact the crossmember or leave less than an inch of ground clearance. On a lowered truck, it is a non-starter.
Pan options and their typical fitment outcomes:
| Pan Type | Clearance (Stock Height 2WD) | Clearance (Lowered 2WD) | Notes |
|---|---|---|---|
| Factory LS truck pan | Marginal to none | None | Too deep for most C10 installs |
| Holley 302-1 / 302-2 | Good | Marginal | Includes pickup and gasket; most popular choice |
| CTS-V pan | Good | Marginal | Works but harder to source; check pickup compatibility |
| Aftermarket shallow pan | Best | Good | Purpose-built for lowered trucks; verify pickup tube |
The Holley 302-1 and 302-2 pans are the most commonly cited fitment-friendly options for the Squarebody. They tuck higher than the truck pan and come with the pickup tube and gasket hardware included.
Small parts that get overlooked with pan swaps:
- Dipstick tube: the LS truck dipstick tube often conflicts with the C10 frame rail. Source an F-body or Camaro-style tube or a universal aftermarket unit.
- Pickup tube O-ring: always replace it when swapping pans. A failed O-ring starves the engine of oil pressure on first start.
- Oil pump pickup compatibility: confirm the pickup tube matches the new pan’s sump location before ordering.
Pro Tip: Buy the pan, pickup tube, and O-ring as a set. Ordering them separately means waiting on a $4 O-ring to hold up a $2,000 engine install.
Shorty vs long-tube headers — what actually fits in a Squarebody?
Both styles work in a 73–87 C10, but they serve different goals and create different clearance problems.
Shorty exhaust manifolds are the practical choice for a daily driver or a truck that sees varied use. They are more durable, less prone to cracking at the collector, and they clear the steering box and A/C bracket with less drama. The tradeoff is flow: shorties leave power on the table compared to long-tubes, which matters more at high RPM than at the torque peak where most C10s live.
Long-tube headers move more exhaust gas and add measurable power, but they demand more planning:
- Collector location on long-tubes often conflicts with the steering shaft on the driver’s side. Measure before ordering.
- On lowered 2WD trucks, long-tube collectors can sit uncomfortably close to the ground. Ceramic-coated stainless headers help with heat management in tight quarters.
- 4WD trucks have additional transfer case clearance concerns on the passenger side.
Exhaust routing notes by configuration:
- Stock-height 2WD: Long-tubes fit with careful collector placement; 3-inch dual exhaust routes cleanly under the frame with an aftermarket crossmember.
- Lowered 2WD: Shorties or mid-length headers are safer. Long-tube collectors may drag.
- 4WD: Shorties are the default recommendation. Transfer case limits collector options on the passenger side.
Material recommendation: Ceramic-coated 304 stainless steel headers hold up in a classic truck environment where heat cycles are frequent and underhood temps run high. Raw steel headers rust quickly in the collector area, especially on a truck that sees rain or road salt.
Fitment note: the C10’s stock steering box sits close to the driver-side header. Confirm clearance with the specific header set you order, not just the brand’s general fitment claim.
Cooling system requirements for an LS-swapped C10
The LS family runs hot under load if the cooling system is undersized. A stock C10 radiator built for a 350 SBC will not keep pace with a 5.3L or 6.0L under tow or sustained highway use.
Radiator selection:
- OE 454 HD-style radiator (3-row or 4-row brass/copper): fits the stock C10 radiator support without modification and handles moderate cooling loads. Good budget option for a mild daily driver.
- All-aluminum aftermarket radiator (2-row, 1.25-inch tubes): better heat rejection than a 4-row brass unit despite fewer rows, because aluminum transfers heat faster. Recommended for any build that will see sustained load or a performance tune.
Fan and shroud setup:
- Dual electric fans with a shroud are the most popular choice for LS-swapped C10s. They free up horsepower, clear the tall intake on performance builds, and allow the engine to sit closer to the firewall if needed.
- A mechanical fan works with a truck-style water pump but limits how far back the engine can sit and adds parasitic load.
- Fan clearance with tall intakes (LS3 manifold, aftermarket units) must be checked. A shroud that fits a stock intake may contact a taller one.
Hose routing:
- Truck-style LS water pumps (LM7, LQ4) route the upper hose to the driver’s side. F-body pumps route it to the passenger side. The choice affects which radiator inlet you need.
- Silicone hose kits designed for the C10 LS swap are available and worth the cost over universal hose with clamps.
Pro Tip: Run a transmission cooler line through the radiator’s built-in cooler tank if your radiator has one, and add a separate external cooler for any build that will tow. Transmission heat kills automatics faster than anything else in a swap build.
Fuel system upgrades your LS engine actually needs
An LS engine requires a high-pressure EFI fuel system. The stock C10 carbureted setup delivers fuel at 6–8 psi. LS injectors need 58 psi. That gap requires a complete fuel delivery overhaul.
Core fuel system components:
- In-tank high-pressure pump: A Walbro 255 LPH or equivalent in-tank pump is the standard choice. It replaces the stock sender unit or mounts in a modified sump. Confirm the sender flange matches your tank before ordering.
- Upgraded hard lines: Replace the original 5/16-inch steel lines with 3/8-inch or larger. AN-style fittings at the engine end make future service easier. The 1/8-inch MNPT x 4AN swivel elbow fitting is a common adapter for connecting hard lines to LS fuel rails.
- Fuel pressure regulator: A return-style regulator set to 58 psi is the cleanest setup. Returnless systems (like the factory truck setup) work but require a compatible ECM tune.
- Fuel filter: Mount an inline filter between the tank and the engine, accessible for service. Do not rely solely on the in-tank sock.
Safety callouts:
- Vent the tank properly. A sealed tank with a high-pressure pump and no vent will build pressure and can split a seam.
- Pressure-test all fittings and connections before cranking the engine. A fuel leak at first start is a fire hazard.
- Confirm filler neck compatibility if you are modifying the tank. Some aftermarket sump kits change the filler neck angle.
For a deeper look at line sizing and pump selection, the fuel system upgrades guide covers the full range of options for performance builds.
Wiring harness and ECM: take-out harness vs aftermarket standalone
This is where most C10 LS swaps either go smoothly or turn into a months-long diagnostic nightmare. The decision you make here determines how much time you spend under the dash.
| Wiring Path | Complexity | Typical Cost | Best For |
|---|---|---|---|
| Donor take-out harness + matching ECM | Low | $300–$800 (with engine) | Builders who want the fastest path to a running engine |
| OEM harness rework (repinned/trimmed) | Medium | $400 | Builders who want OEM reliability with a cleaner install |
| Aftermarket standalone (Holley, FiTech) | High upfront, simpler long-term | $900 | Builders who want full tuning control or are adding forced induction |
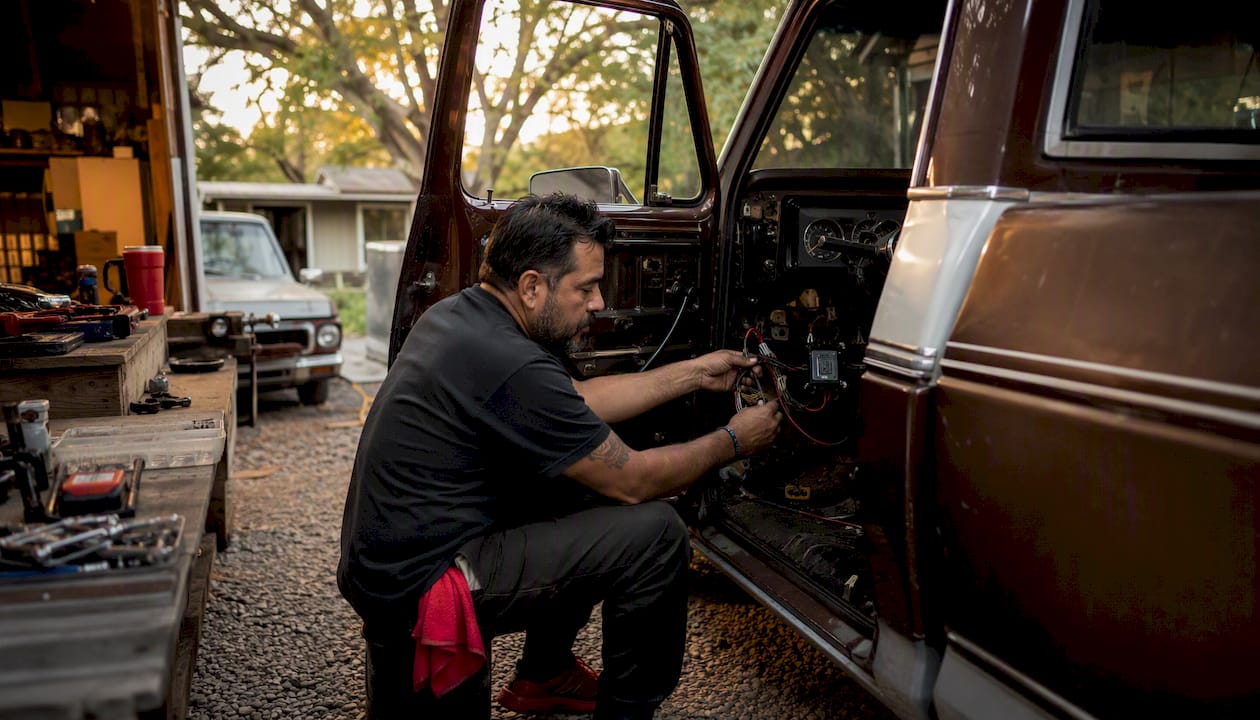
The take-out harness path wins for most C10 builds. When the harness, ECM, and engine come from the same donor vehicle, the sensors, transmission controls, and calibration are already matched. You are not guessing which tune the ECM expects or whether the MAF calibration is correct.
Tejas SteelWorks’ LS swap guide specifically recommends buying complete take-out truck engines with the harness and ECM intact to minimize unknowns during the swap.
Common integration items to address regardless of path:
- VSS (Vehicle Speed Sensor): The C10’s transmission may not have a VSS output the ECM expects. A transmission-mounted VSS or a driveshaft-mounted sensor solves this.
- Cruise control: Retaining factory cruise requires the correct ECM and a compatible brake switch signal.
- A/C circuits: If you are running A/C, the ECM needs to see the A/C request signal to bump idle and cycle the compressor correctly.
- Grounding: Poor grounds cause more LS swap electrical problems than bad wiring. Run dedicated ground straps from the engine block and cylinder heads to the frame and firewall.
Ozkonickustomz stocks the 03–06 GM 4.8/5.3/6.0L EFI harness and a tuned ECM option that pair well with the most common truck engine donors.
Pro Tip: When ordering a harness rework from a vendor, ask specifically whether A/C and cruise control circuits are preserved and whether the VSS output is configured for your transmission. These three items account for the majority of post-install electrical complaints.
Accessory brackets, alternator, A/C, and power steering
The LS engine’s accessory drive is not a direct bolt-on to C10-specific brackets. You need a bracket system that keeps components away from the frame rails and inner fenders while routing the belt cleanly.
Common accessory drive options:
- High-mount alternator kits: Move the alternator to the top of the engine, away from the driver-side frame rail. This is the preferred layout for C10 installs because it clears the steering box and leaves room for long-tube headers.
- Stock truck accessory layout: Works on stock-height C10s with shorty headers. The alternator sits low on the driver’s side, which can conflict with the steering shaft on some builds.
- Sanden-style A/C compressor: The Sanden 508 or equivalent is the most common choice for classic truck A/C retrofits. It mounts to LS-specific brackets and pairs with a parallel-flow condenser for good cooling capacity.
- Power steering pump: The LS truck power steering pump mounts on the passenger side. It can drive the C10’s original power steering box through a high-pressure hose conversion, or you can convert to a rack-and-pinion setup if the budget allows.
Accessory drive parts that require matched pulleys and belt lengths:
- Alternator pulley diameter must match the crank pulley ratio for correct charging RPM
- A/C compressor pulley must align with the condenser and evaporator capacity
- Power steering pump pulley must match the pump’s flow rate for the steering box
Tools and shop resources you need before starting
You can do most of this swap with a well-equipped home garage, but a few specialty items are non-negotiable.
Essential tools:
- Engine hoist (2-ton minimum) and load leveler for controlled engine placement
- Torque wrench set (ft-lb and in-lb ranges)
- Harmonic balancer installer and puller (do not hammer the balancer on)
- Fuel pressure tester (confirm 58 psi before first crank)
- OBD-II scanner with live data capability (or a laptop with HP Tuners or EFI Live for tuning access)
- Wiring crimp tools and a quality heat-shrink terminal set
- Angle grinder and welder if any crossmember or mount modification is needed
Shop-level resources to line up before you start:
- Local driveline shop: For driveshaft trimming and balancing. Call ahead and get a quote before the engine is in the truck.
- Wiring specialist: If you are reworking an OEM harness rather than using a take-out unit, a specialist saves days of diagnostic work.
- Dyno shop or mobile tuner: The ECM needs a proper tune after install. A base tune gets the engine running; a dyno tune extracts the power and dials in fuel trims, timing, and idle quality.
- Machine shop (if needed): For any block prep, head work, or cam install if you are building the engine rather than using a stock take-out.
Full C10 LS swap parts checklist — buy-ready with fitment notes
This table covers every major system. Work through it before placing your first order.
| System | Part / Type | Fitment Note | Donor Match | Source |
|---|---|---|---|---|
| Engine | 5.3L LM7 or 6.0L LQ4 take-out | Fits all 73–87 C10 frames | GMT800 Silverado/Tahoe | Junkyard or take-out supplier |
| Motor mounts | C10-specific LS clamshell mounts | 2WD and 4WD versions differ | All LS truck blocks | Ozkonickustomz / Tejas-style kit |
| Transmission crossmember | Aftermarket C10 LS crossmember | Aftermarket preferred for dual exhaust | Matches mount kit | Ozkonickustomz / kit supplier |
| Oil pan | Holley 302-1 (stock height) / 302-2 (lowered) | Confirm crossmember clearance | All Gen III LS | Aftermarket supplier |
| Oil pan pickup | Matching pickup tube + O-ring | Must match pan sump location | Pan-specific | Order with pan |
| Dipstick tube | F-body or universal aftermarket | Truck tube hits C10 frame rail | Pan-specific | Aftermarket |
| Wiring harness | Donor take-out harness or OEM rework | Match to ECM year/calibration | Same donor as engine | Ozkonickustomz / donor |
| ECM / PCM | Matching donor ECM or tuned unit | Must match harness and engine | Same donor as harness | Ozkonickustomz ECM product |
| Headers | LS Squarebody shorty or long-tube | Confirm steering clearance | All LS blocks | Aftermarket header supplier |
| Radiator | All-aluminum 2-row aftermarket | Measure inlet/outlet location | N/A | Aftermarket |
| Electric fans | Dual fan + shroud kit | Confirm clearance with intake height | N/A | Aftermarket |
| Fuel pump | Walbro 255 LPH in-tank | Confirm sender flange size | N/A | Aftermarket |
| Fuel lines | 3/8-inch AN hard line + fittings | Replace full run from tank to rail | N/A | Ozkonickustomz AN fittings |
| Fuel regulator | 58 psi return-style regulator | Required for LS injector pressure | N/A | Aftermarket |
| Transmission | 4L60E / 4L80E | Confirm crossmember and driveshaft | GMT800 donor | Junkyard or rebuilt |
| Torque converter / flexplate | LS-pattern flexplate + matching converter | Must match transmission bolt pattern | Transmission-specific | Aftermarket |
| Driveshaft | Trimmed and balanced to new length | Typically 1–2 inches shorter than SBC | N/A | Local driveline shop |
| Transmission adapter | If using non-LS trans | Verify bolt pattern and input shaft | Trans-specific | Aftermarket |
| Coolant hoses | Silicone C10 LS hose kit | Match water pump outlet side | Pump-specific | Aftermarket |
| Sensors | MAP, IAT, O2 sensors (from donor) | Keep all donor sensors with engine | Same donor | Donor / Ozkonickustomz |
| Gaskets | Full engine gasket set | Use OEM or Fel-Pro equivalent | Engine-specific | Parts supplier |
| AN fittings | 1/8-inch MNPT x 4AN elbows and adapters | Fuel rail and line connections | N/A | Ozkonickustomz |
| Brake vacuum | Manifold vacuum port or remote pump | Confirm idle vacuum with cam choice | N/A | Aftermarket |
| Accessory brackets | High-mount alternator + A/C bracket kit | Confirm header clearance | LS block-specific | Aftermarket kit supplier |
Small parts that builders consistently miss:
- Pickup tube O-ring (replace every time the pan comes off)
- Sensor pigtail connectors (crankshaft position, cam position, knock sensors)
- AN adapter fittings at the fuel rail
- Transmission cooler fittings if the radiator has an integrated cooler
Pro Tip: Stage parts by system before the engine arrives. Engine and trans in one area, wiring in another, fuel parts in a third. You will find missing items before the truck is on jack stands, not after.
How long does a C10 LS swap take, and what does it cost?
Realistic numbers for a first-time builder doing the work at home:
- Engine and transmission sourcing / prep: 1–2 weeks (finding a clean take-out, pulling and inspecting it)
- Frame prep and mock-up (mounts, crossmember, oil pan): 8–16 hours
- Engine and transmission installation: 6–10 hours
- Wiring integration (take-out harness): 12–24 hours
- Fuel system plumbing: 6–10 hours
- Cooling system and accessories: 6–8 hours
- Initial startup and diagnostics: 4–8 hours
- Driveshaft and exhaust: 4–8 hours (plus driveline shop time)
- Dyno tune: 4–8 hours at the shop
Total DIY time: roughly 50–90 hours spread over several weekends.
Cost reality check: A budget build using a junkyard 5.3L take-out ($400–$800), used transmission ($300–$600), and a mix of new and used parts typically lands between $4,000 and $7,000 in parts alone. A professional install adds $3,000–$6,000 in labor. A performance build with a fresh 6.0L, new transmission, full wiring rework, and dyno tune can reach $12,000–$18,000 or more before paint and bodywork. The biggest cost surprises are almost always wiring/tuning, custom exhaust fabrication, and driveshaft work.
How Ozkonickustomz sources and verifies parts for C10 LS swaps
Every part Ozkonickustomz sells for the 73–87 C10 LS conversion comes from vetted manufacturers and goes through fitment verification before it reaches the product page. That means no guessing whether a harness kit was designed for a different platform and relabeled.
What to expect when ordering from Ozkonickustomz:
- Fitment support via direct contact for part matching and bundle questions
- Fast shipping on in-stock items with straightforward returns on uninstalled parts
- Expert assistance for builders who need help matching a harness to a specific donor engine year
Verification steps you should run before ordering any pan, mount, or crossmember:
- Measure your frame rail width at the crossmember mounting points
- Check the distance from the bottom of the crossmember to the ground (stock height vs lowered)
- Compare the oil pan pickup clearance spec against your crossmember height
- Confirm your transmission’s output shaft length before ordering a driveshaft
Key Takeaways
A complete take-out LS truck engine with its matching harness and ECM is the single most important purchase in a 73–87 C10 LS swap, and it should be paired with a purpose-built mount and crossmember kit before anything else is ordered.
| Point | Details |
|---|---|
| Buy the engine complete | A take-out 5.3L or 6.0L with harness, sensors, and ECM cuts wiring complexity and tuning cost dramatically. |
| Oil pan first, engine second | Choose your pan (Holley 302-1 for stock height, 302-2 for lowered) before the engine drops in — swapping it after costs a full day. |
| Matched mount and crossmember kit | Engineered kits that pair mounts and crossmember together reduce trial fitting and integrate cleanly with headers and driveline. |
| Fuel system is a full replacement | LS injectors need 58 psi; the stock carb system delivers 6–8 psi. Replace the pump, lines, and regulator completely. |
| Ozkonickustomz for harness and fittings | Ozkonickustomz stocks OEM-style LS harnesses, tuned ECMs, and AN fittings that cover the most common 73–87 C10 swap configurations. |
The lesson most builders learn the hard way
The oil pan and the wiring harness are the two decisions that separate a smooth C10 LS swap from a project that stalls for months. Most builders focus on the engine choice and the headers, which are genuinely fun to research, and then discover at engine installation that the pan they grabbed from the donor truck contacts the crossmember by two inches. Pulling the engine back out to swap pans is a full day of work that a five-minute measurement would have prevented.
The wiring situation is similar. Builders who buy a bare engine and then try to source a harness separately often end up with a harness from a different model year with different sensor connectors, a mismatched ECM calibration, and a transmission control strategy that does not match their converter. The take-out approach, where the engine, harness, and ECM come from the same vehicle, eliminates all of that. The ECM already knows the engine. The sensors are already connected. The tune is already close enough to start and drive to a dyno.
Practical parting advice: write down the donor vehicle’s VIN before the junkyard crushes it. That VIN unlocks the original build sheet, the transmission calibration, and the ECM tune data, all of which your tuner will want when dialing in the final calibration.
Ozkonickustomz has the swap parts your C10 build needs
If you have read through this checklist and you are ready to start ordering, Ozkonickustomz is the direct source for the wiring and electrical components that most builders struggle to find in one place. The store stocks OEM-style LS harnesses, tuned ECM units, and the Highway 22 modular wiring kit designed for truck-mount applications, along with AN fittings, accessory hardware, and the small parts that show up on every build’s “forgot to order” list.
Ozkonickustomz sources directly from vetted manufacturers, which means the harness you order was designed for the application, not adapted from a different platform. Fitment support is available for bundle questions, and staged shipping is an option for large orders where you want mounts and crossmember before the engine arrives. Browse the full LS swap parts guide to see what is in stock, or contact the team directly for a custom bundle quote on your specific 73–87 C10 build.
Primary sources and further reading
The guides and product pages below were used to compile the fitment notes, parts recommendations, and wiring strategy in this article. Save or bookmark the ones that match your build phase.
Fitment and install guides:
- 73–87 LS Swap Guide (Tejas SteelWorks PDF) — the most detailed system-by-system parts list available for this platform; covers engine choices, harness strategy, mounts, driveline, cooling, and fuel
- How to Install an LS Engine Into a 73–87 GM C10 Truck (ChevyDIY) — step-by-step install walkthrough with oil pan and crossmember fitment notes; the source for the Holley pan recommendations
- 1979 Chevy C10 LS Swap Guide (akschaefer.com) — real-world builder guide with actual mount brand callouts, header choices, and tool list from a completed build
- Squarebody LS Swap Parts List (jovanidantegriego.com) — community parts list with small-parts callouts and fitment annotations from an 81 C20 project
Product and wiring resources:
- Tejas SteelWorks C10 LS Swap Mounts (product page) — mount fitment notes and frame-modification caveats for C10 applications
- LS Swap Parts: Gen III, IV & LT Builder’s Guide (Ozkonickustomz) — in-house guide covering harness bundles, ECM options, and wiring components for LS conversions
- 03–06 GM 4.8/5.3/6.0L EFI Harness (Ozkonickustomz product) — harness product page for the most common truck engine donors
Print the parts checklist table from the section above and work through it system by system before placing your first order. The builders who finish this swap on schedule are the ones who had every part staged and measured before the engine left the donor vehicle.